The Reachability tool generates time-based travel maps on the fly, taking into considering multiple transport modes - Car, Motorbike and Walk.
Note: The Reachability tool can only be used where Road Network data is available.
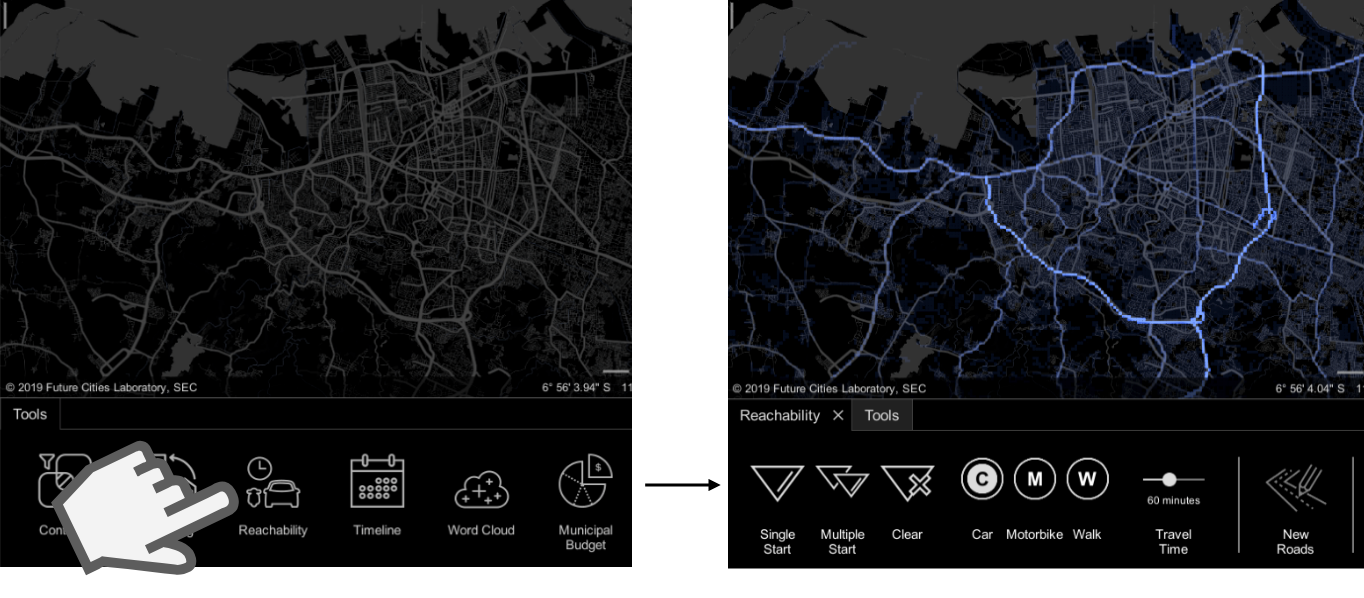
Step 1: Activate the Tool
- Click on the 'Reachability' tool to activate it.
- Once the road network data layer is loaded, the tool is ready to be used.
- Note: Starting this tool may require some waiting time depending on the volume of the road network data.
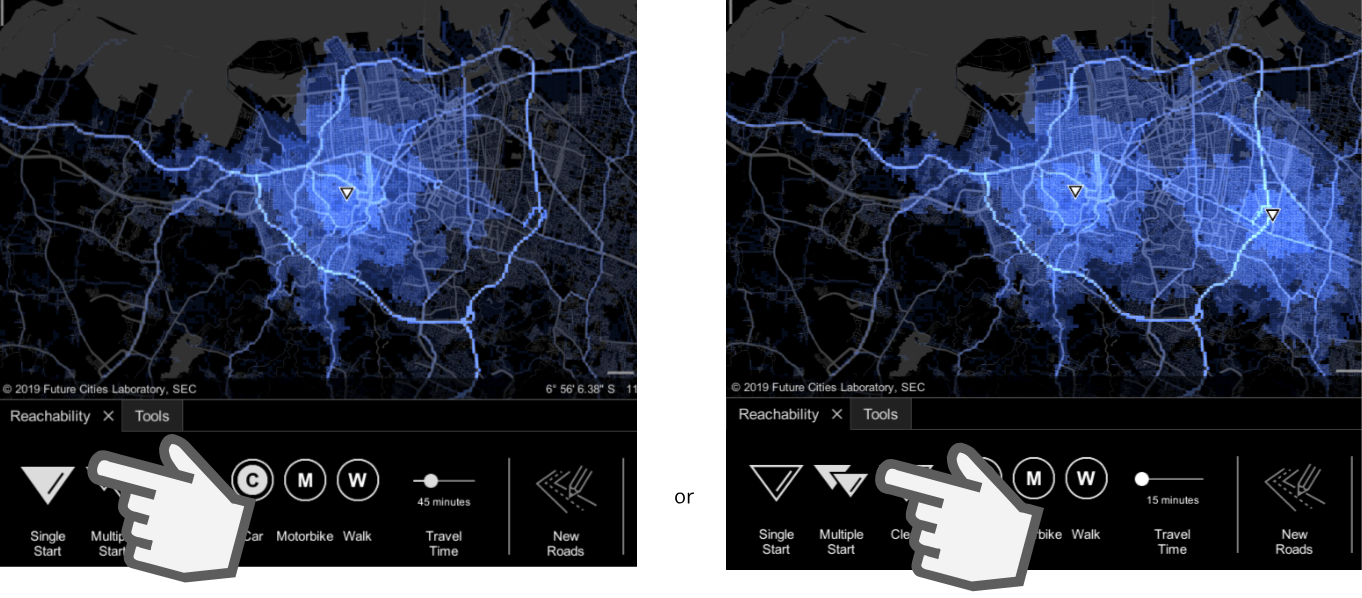
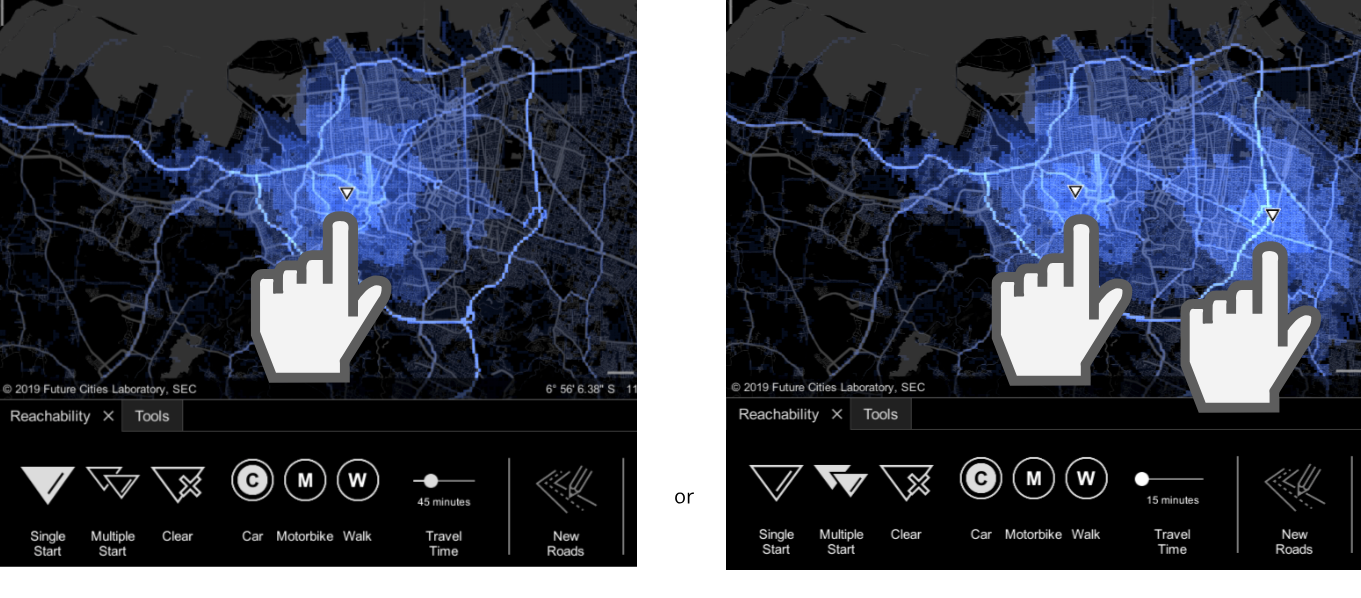
Step 2: Select Single or Multiple Points
- Click on either the 'Single Point' or 'Multiple Points' button.
- If you would like to only view the reachability of one point, select the former;
- Or select the latter for reachability of multiple points.
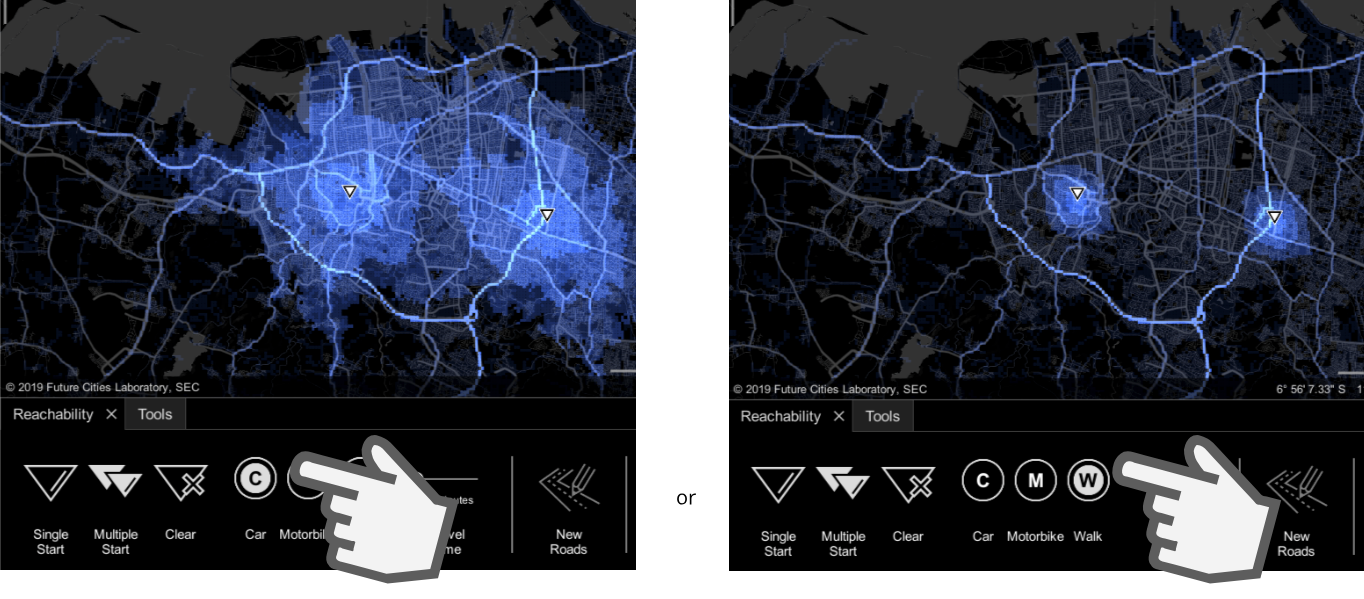
Step 3: Select the Mobility Mode
- The modes available by default are Car, Motorbike and Walk - with the Car being selected by default.
- You may choose to change the mobility mode.
Step 4: Edit Mobility Mode's Speed
- Click on the 'Edit Speed' button.
- Modify the currently selected mobility's speed for different road types in the panel.
- Click on the 'Save' button to save the modified speeds permanently.
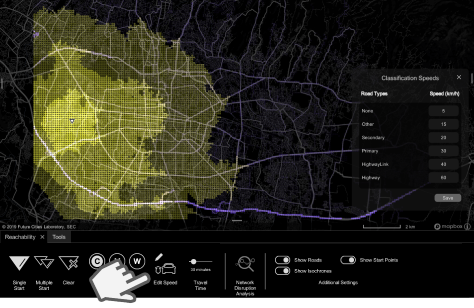
Step 5: Setting Total Travel Time
- To set the total travel time, drag across the slider.
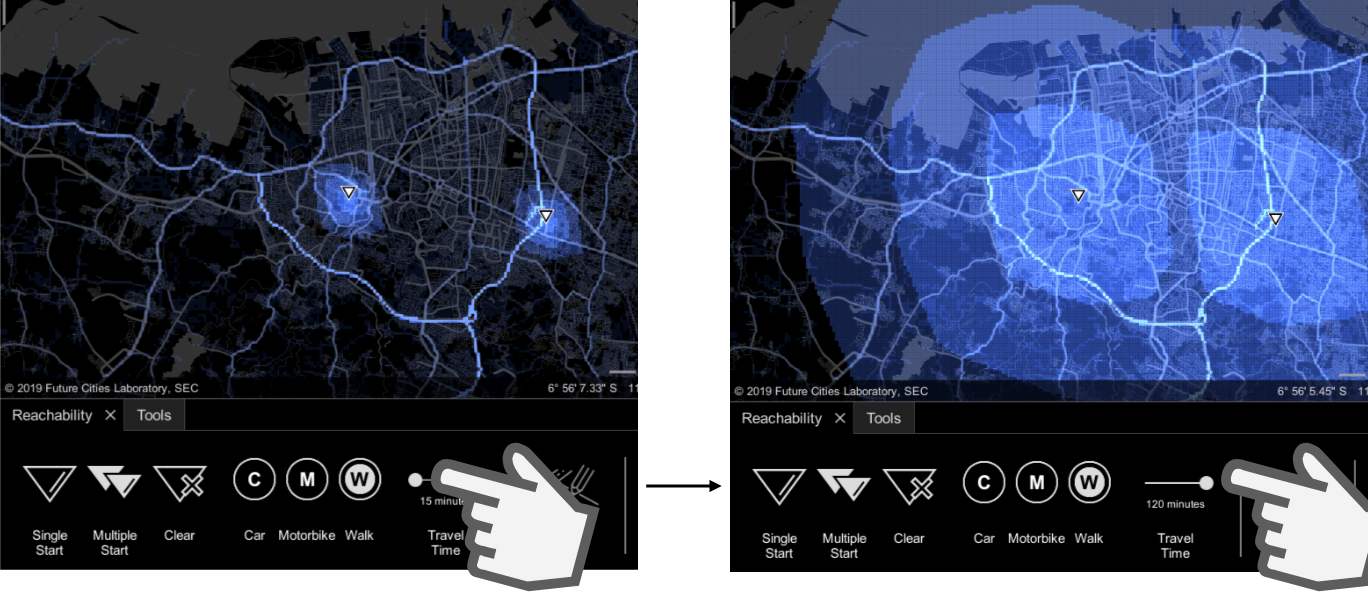
Step 6: Begin Pinning Point(s)
- Begin clicking on the map to pin the point(s).
- You should immediately see the reachability of the point being generated in blue.
- Tip: You may want to switch on a data layer that could guide the placement of these points (For example, jurisdiction data layer, healthcare amenities data layer).
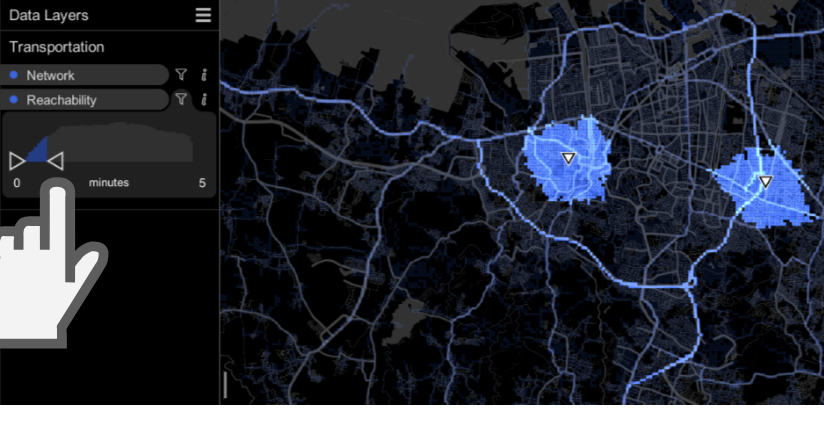
Step 7: Filter Reachability Time
- On running the 'Reachability' tool, a data layer named Reachability will be generated and added to the data layers panel on the left.
- As the data is uncategorised, you may filter the reachability data displayed using the slider.