¶ Working With Layers Overview
A key feature of ur-scape is the multiple data layers. Before delving into how these data layers and their groups can be organised, users should understand how layers and groups work.

For each site in ur-scape, it contains its own unique set of data layers that can be overlaid for visualisation and analyses (as illustrated below). Essentially every individual data set being imported into ur-scape will be an individual data layer.

The order of these layers is organised across all sites, using the 'Organise Layers' function. Any changes made to a layer (i.e. spelling, display colour, order) will be made to all instances of that layer across all sites.

¶ Step By Step Tutorial
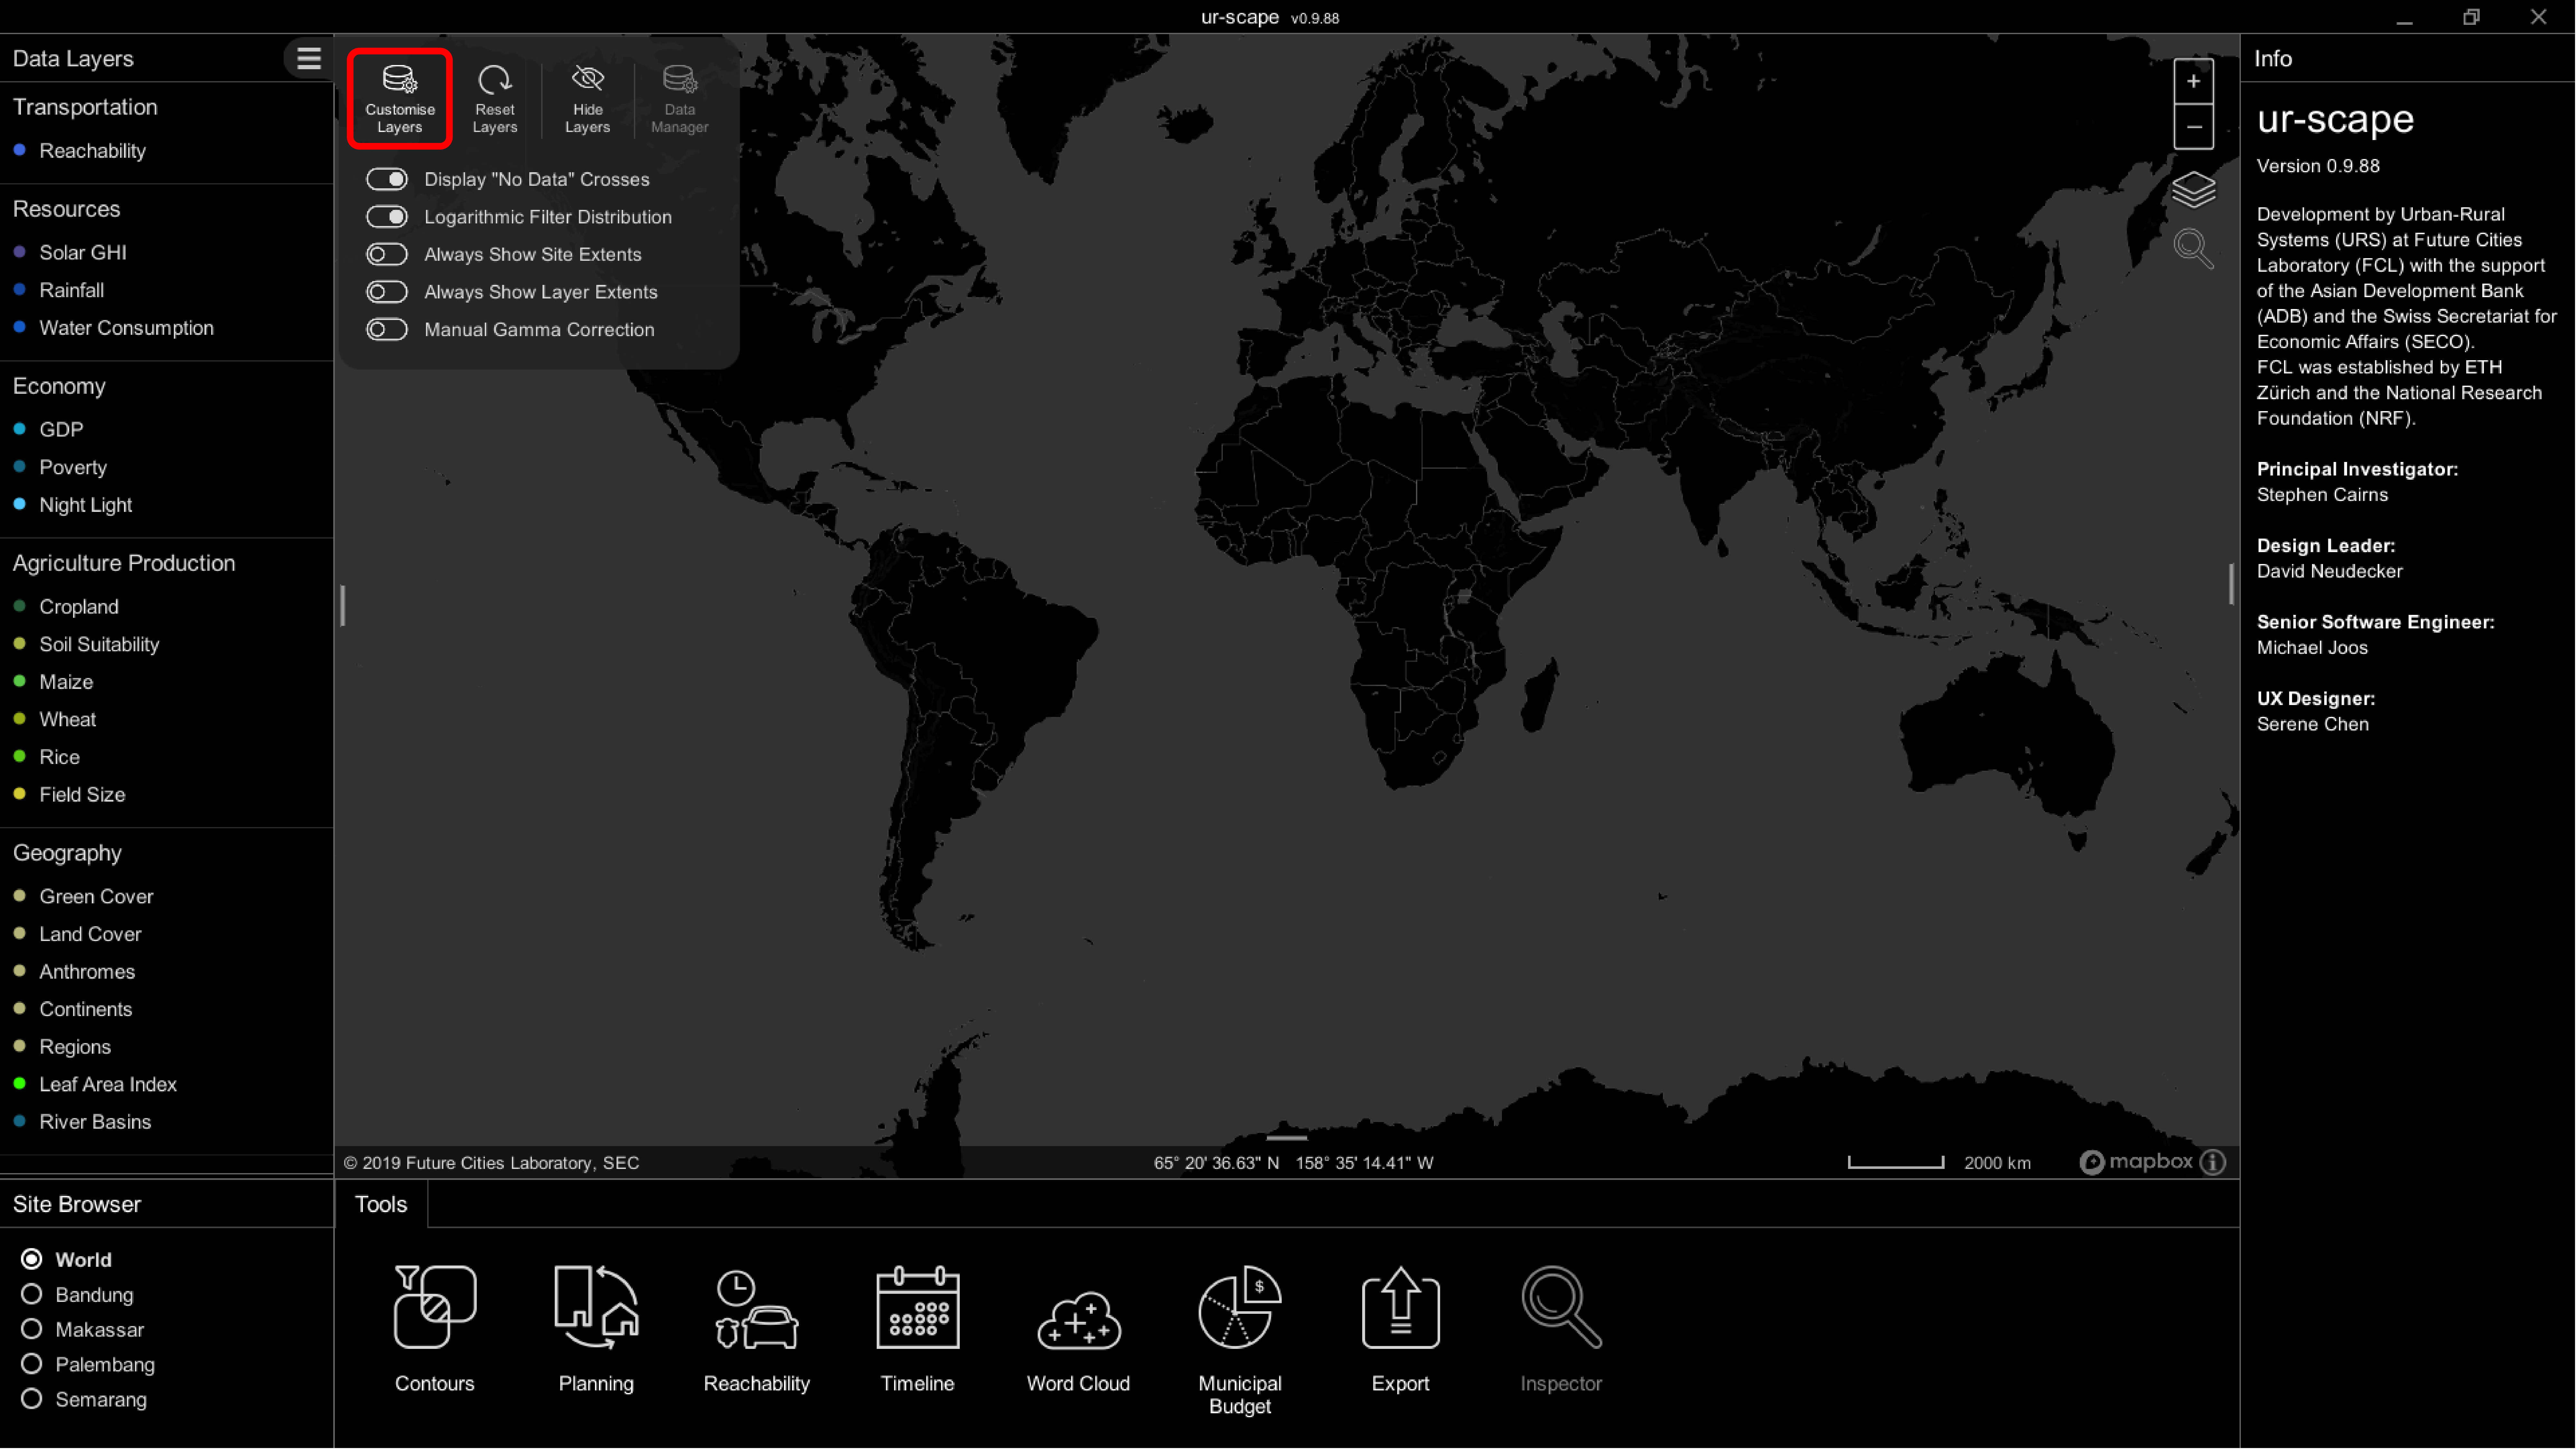
Step 1: To customise data layers and groups click on the hamburger icon to reveal the secondary menu.
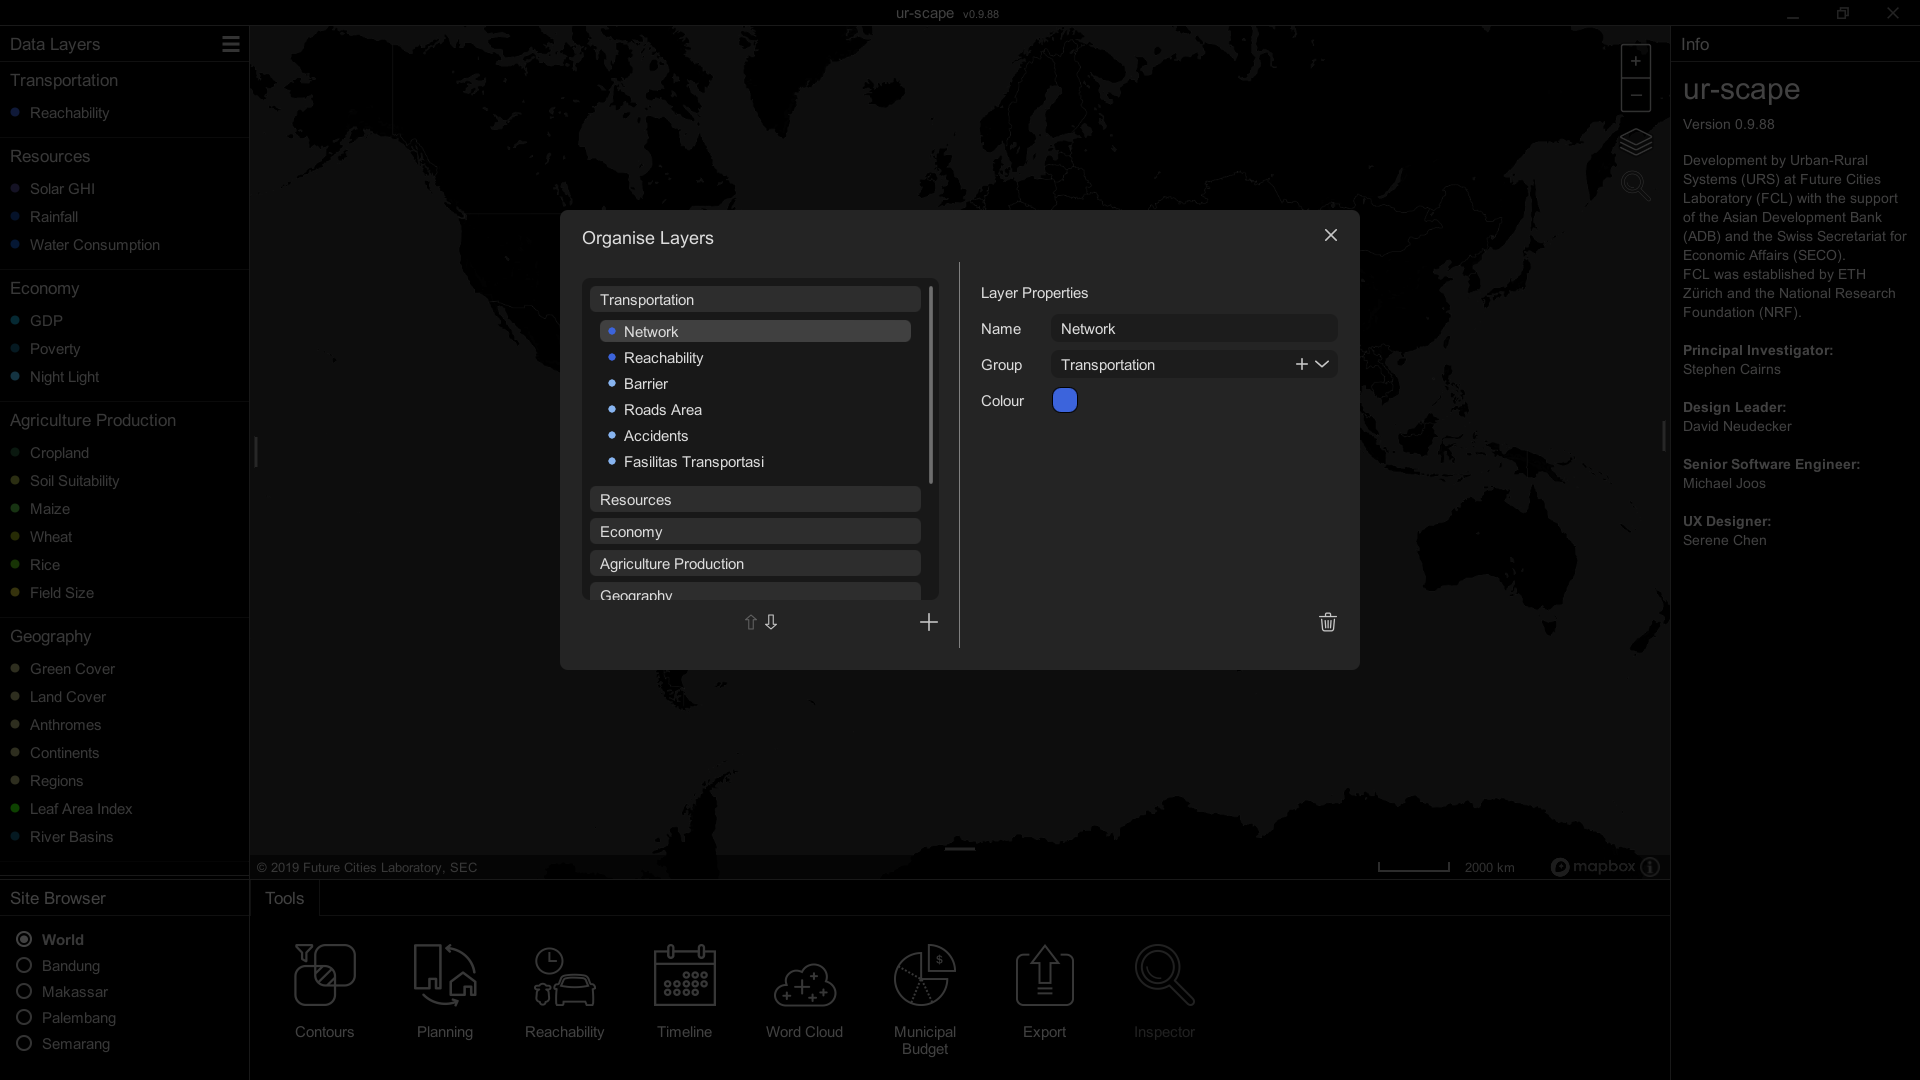
Step 2:Organise Layers
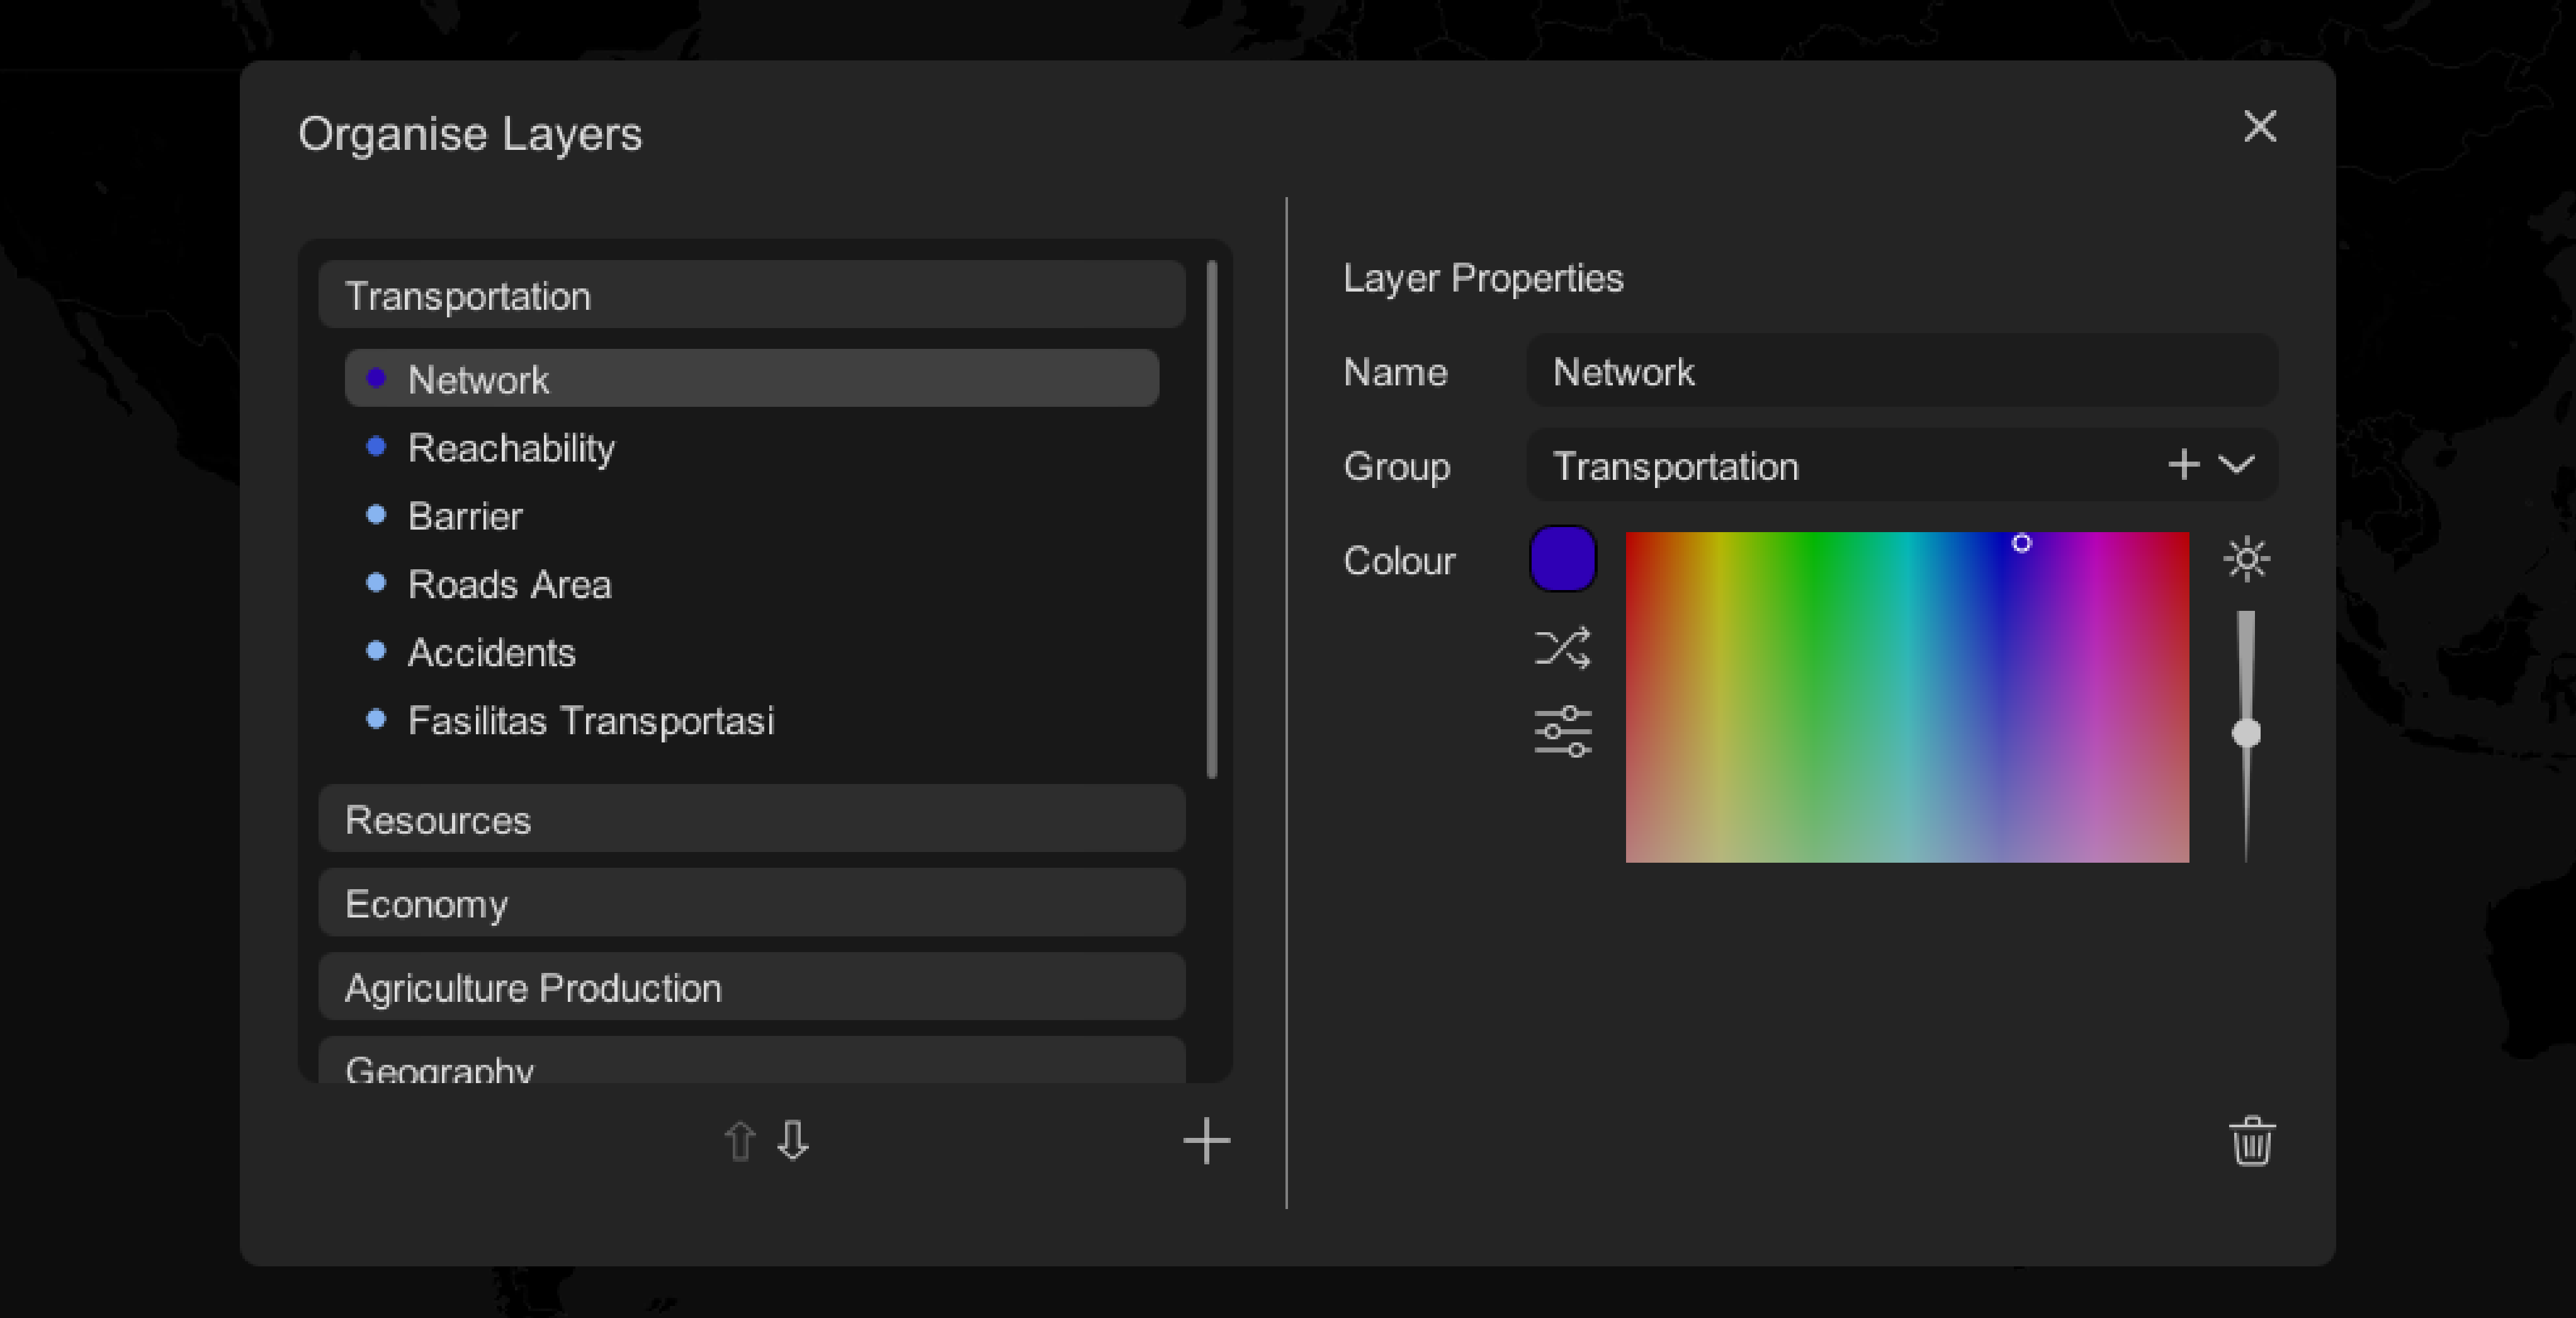
is a secondary interface that allows users to: edit the name of data layers/groups, change the grouping of data layers, re-order of data layers/groups, and also change the display colour of data layers.
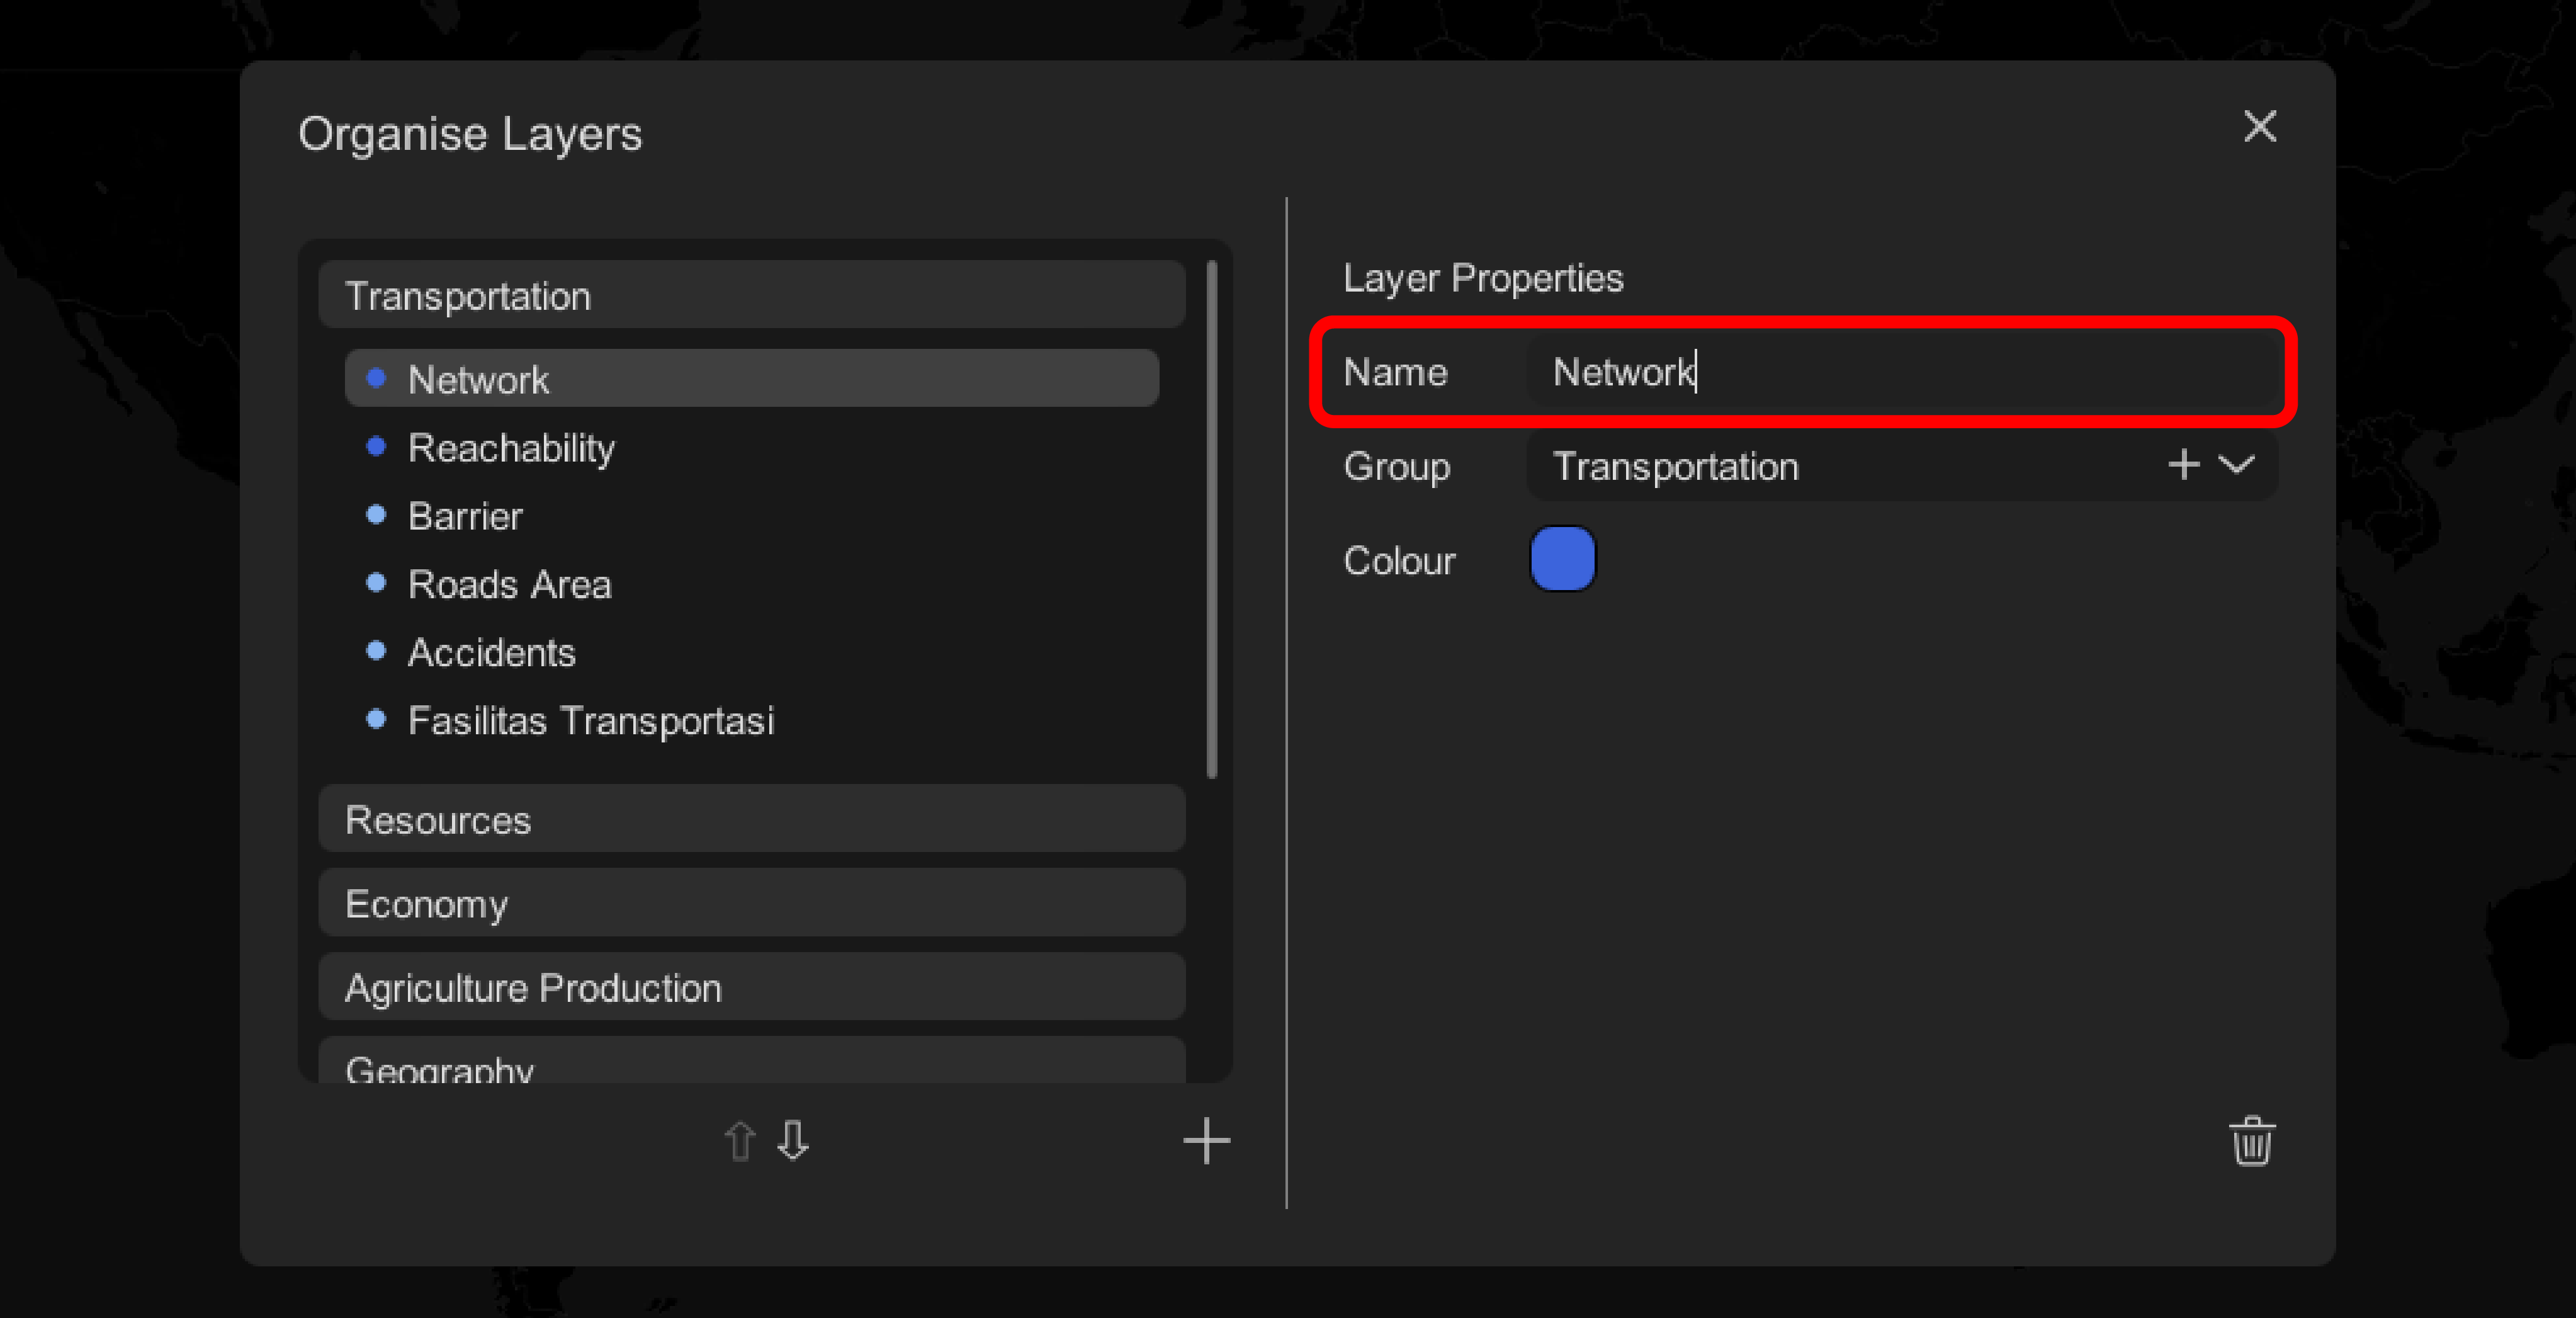
Step 3:Edit Data Layer Name
To edit name of a data layer, simply click on the first field in Layer Properties panel on the right. A caret will appear, and you can type the new name of the layer.
Step 4: Edit Group Name
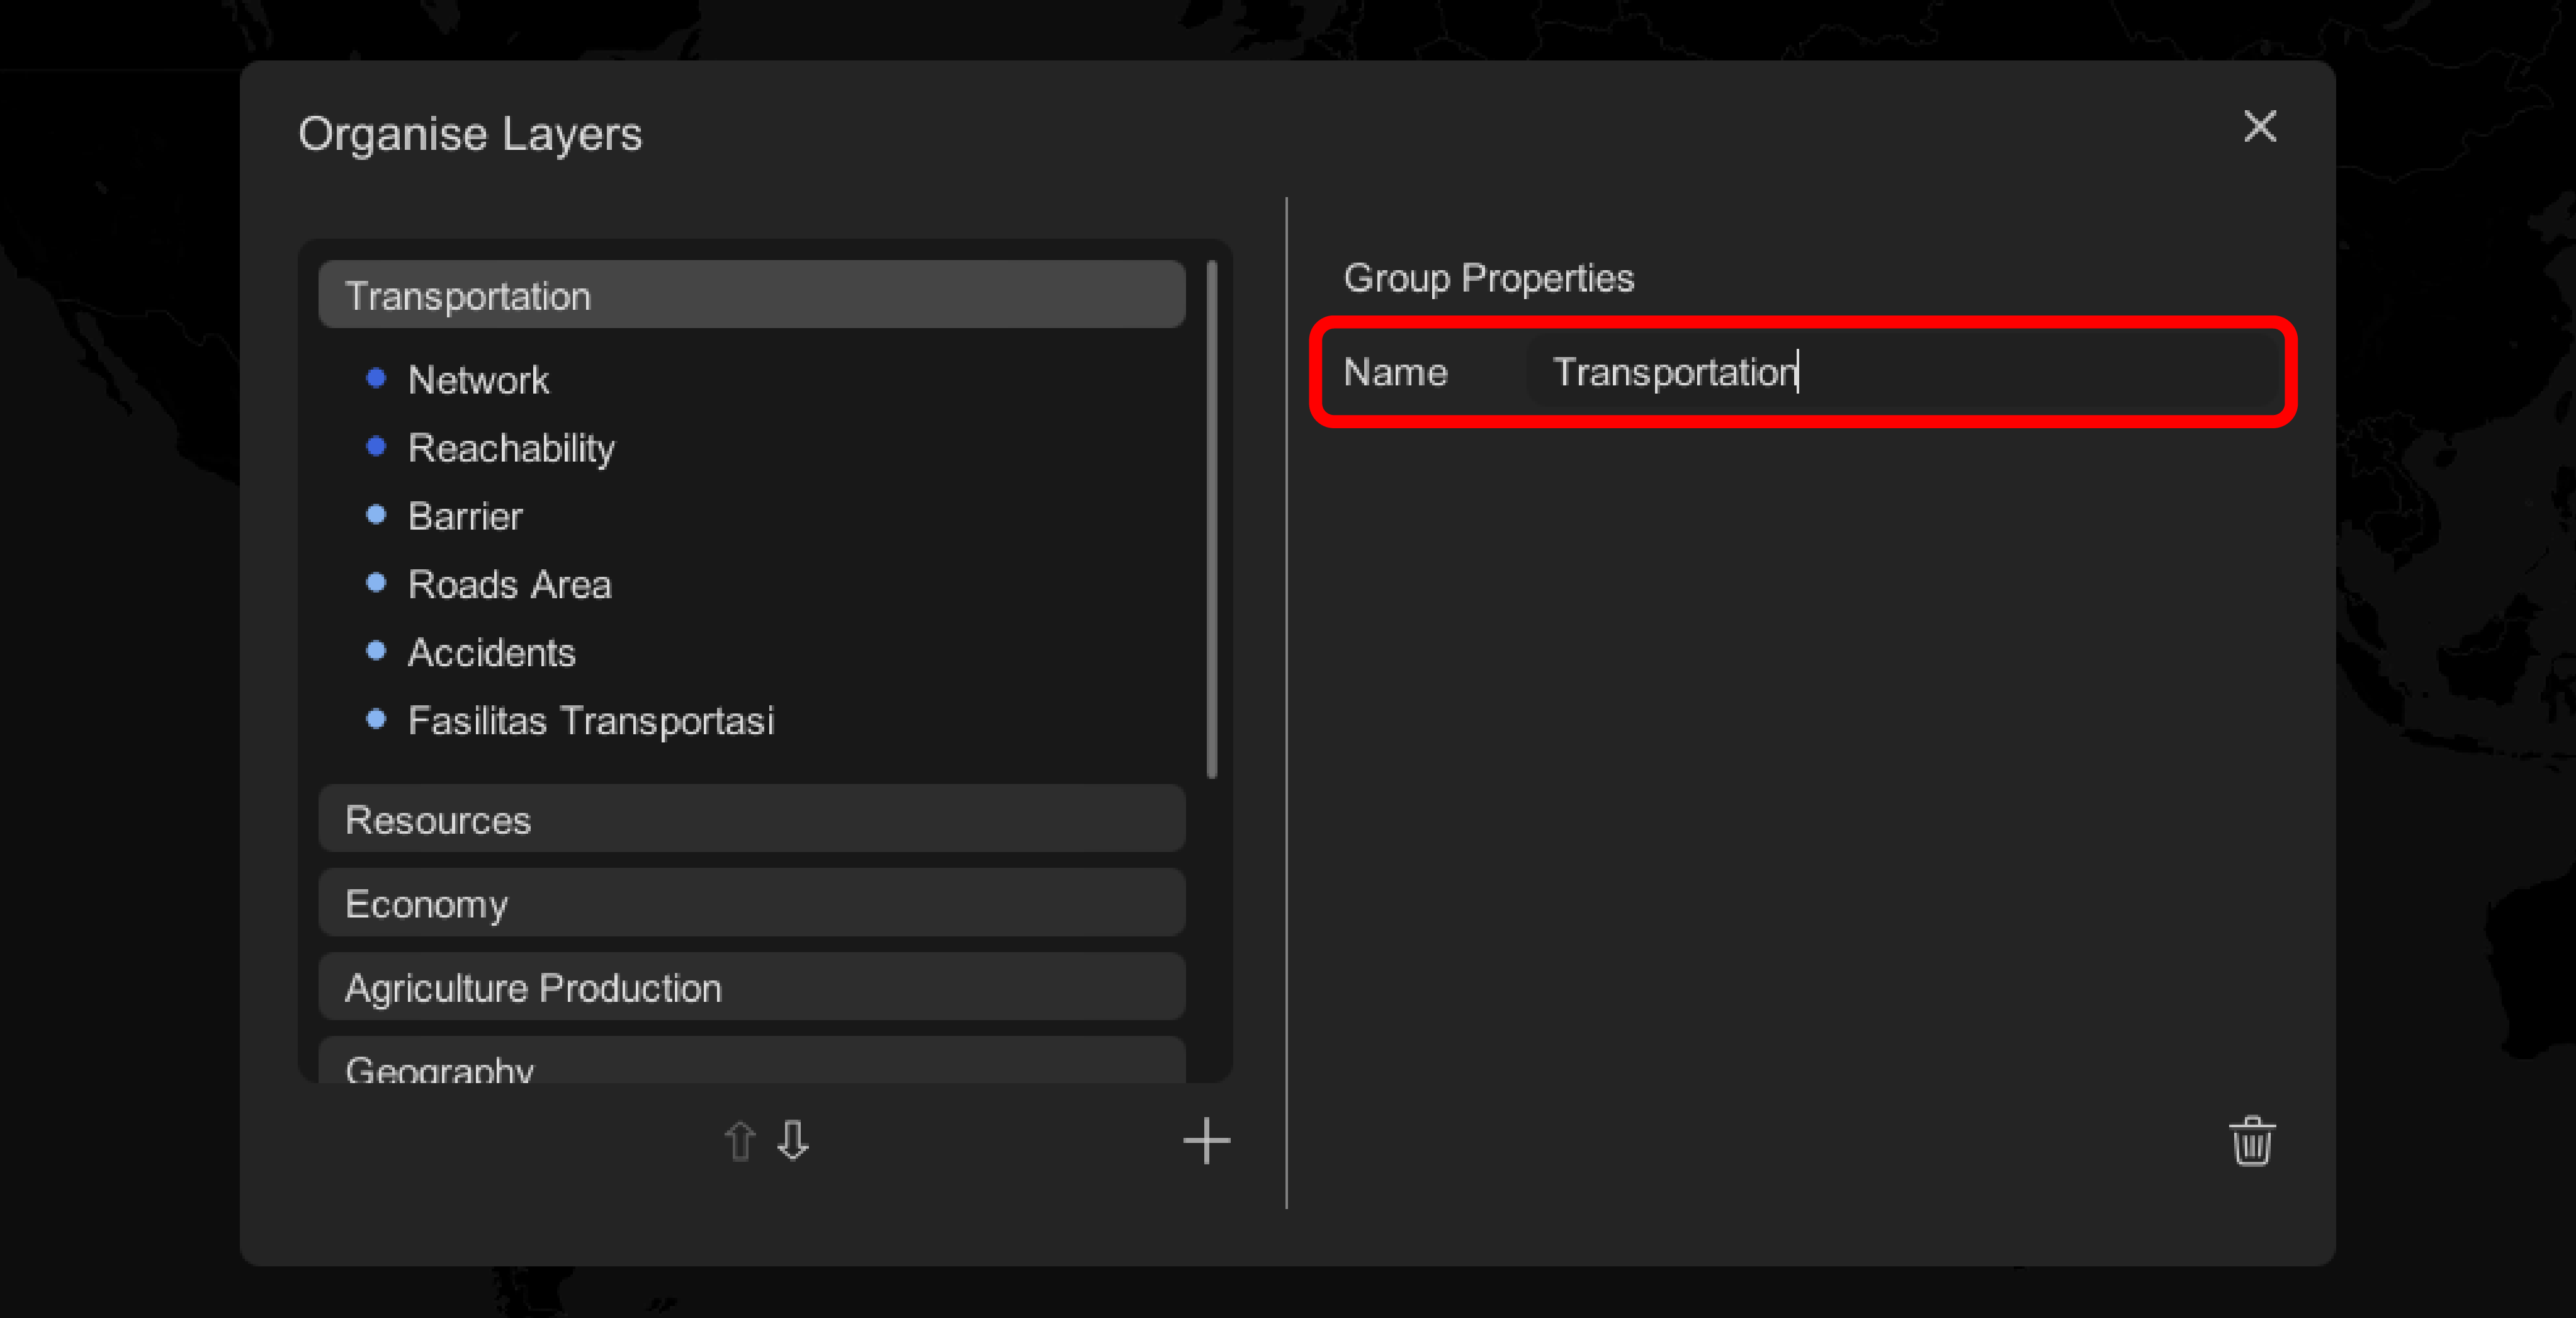
To edit name of a group, first click on the group you would like to re-name. The right panel will switch to the Group Properties panel. Here you simply need to click on the Name field and you may rename the group.
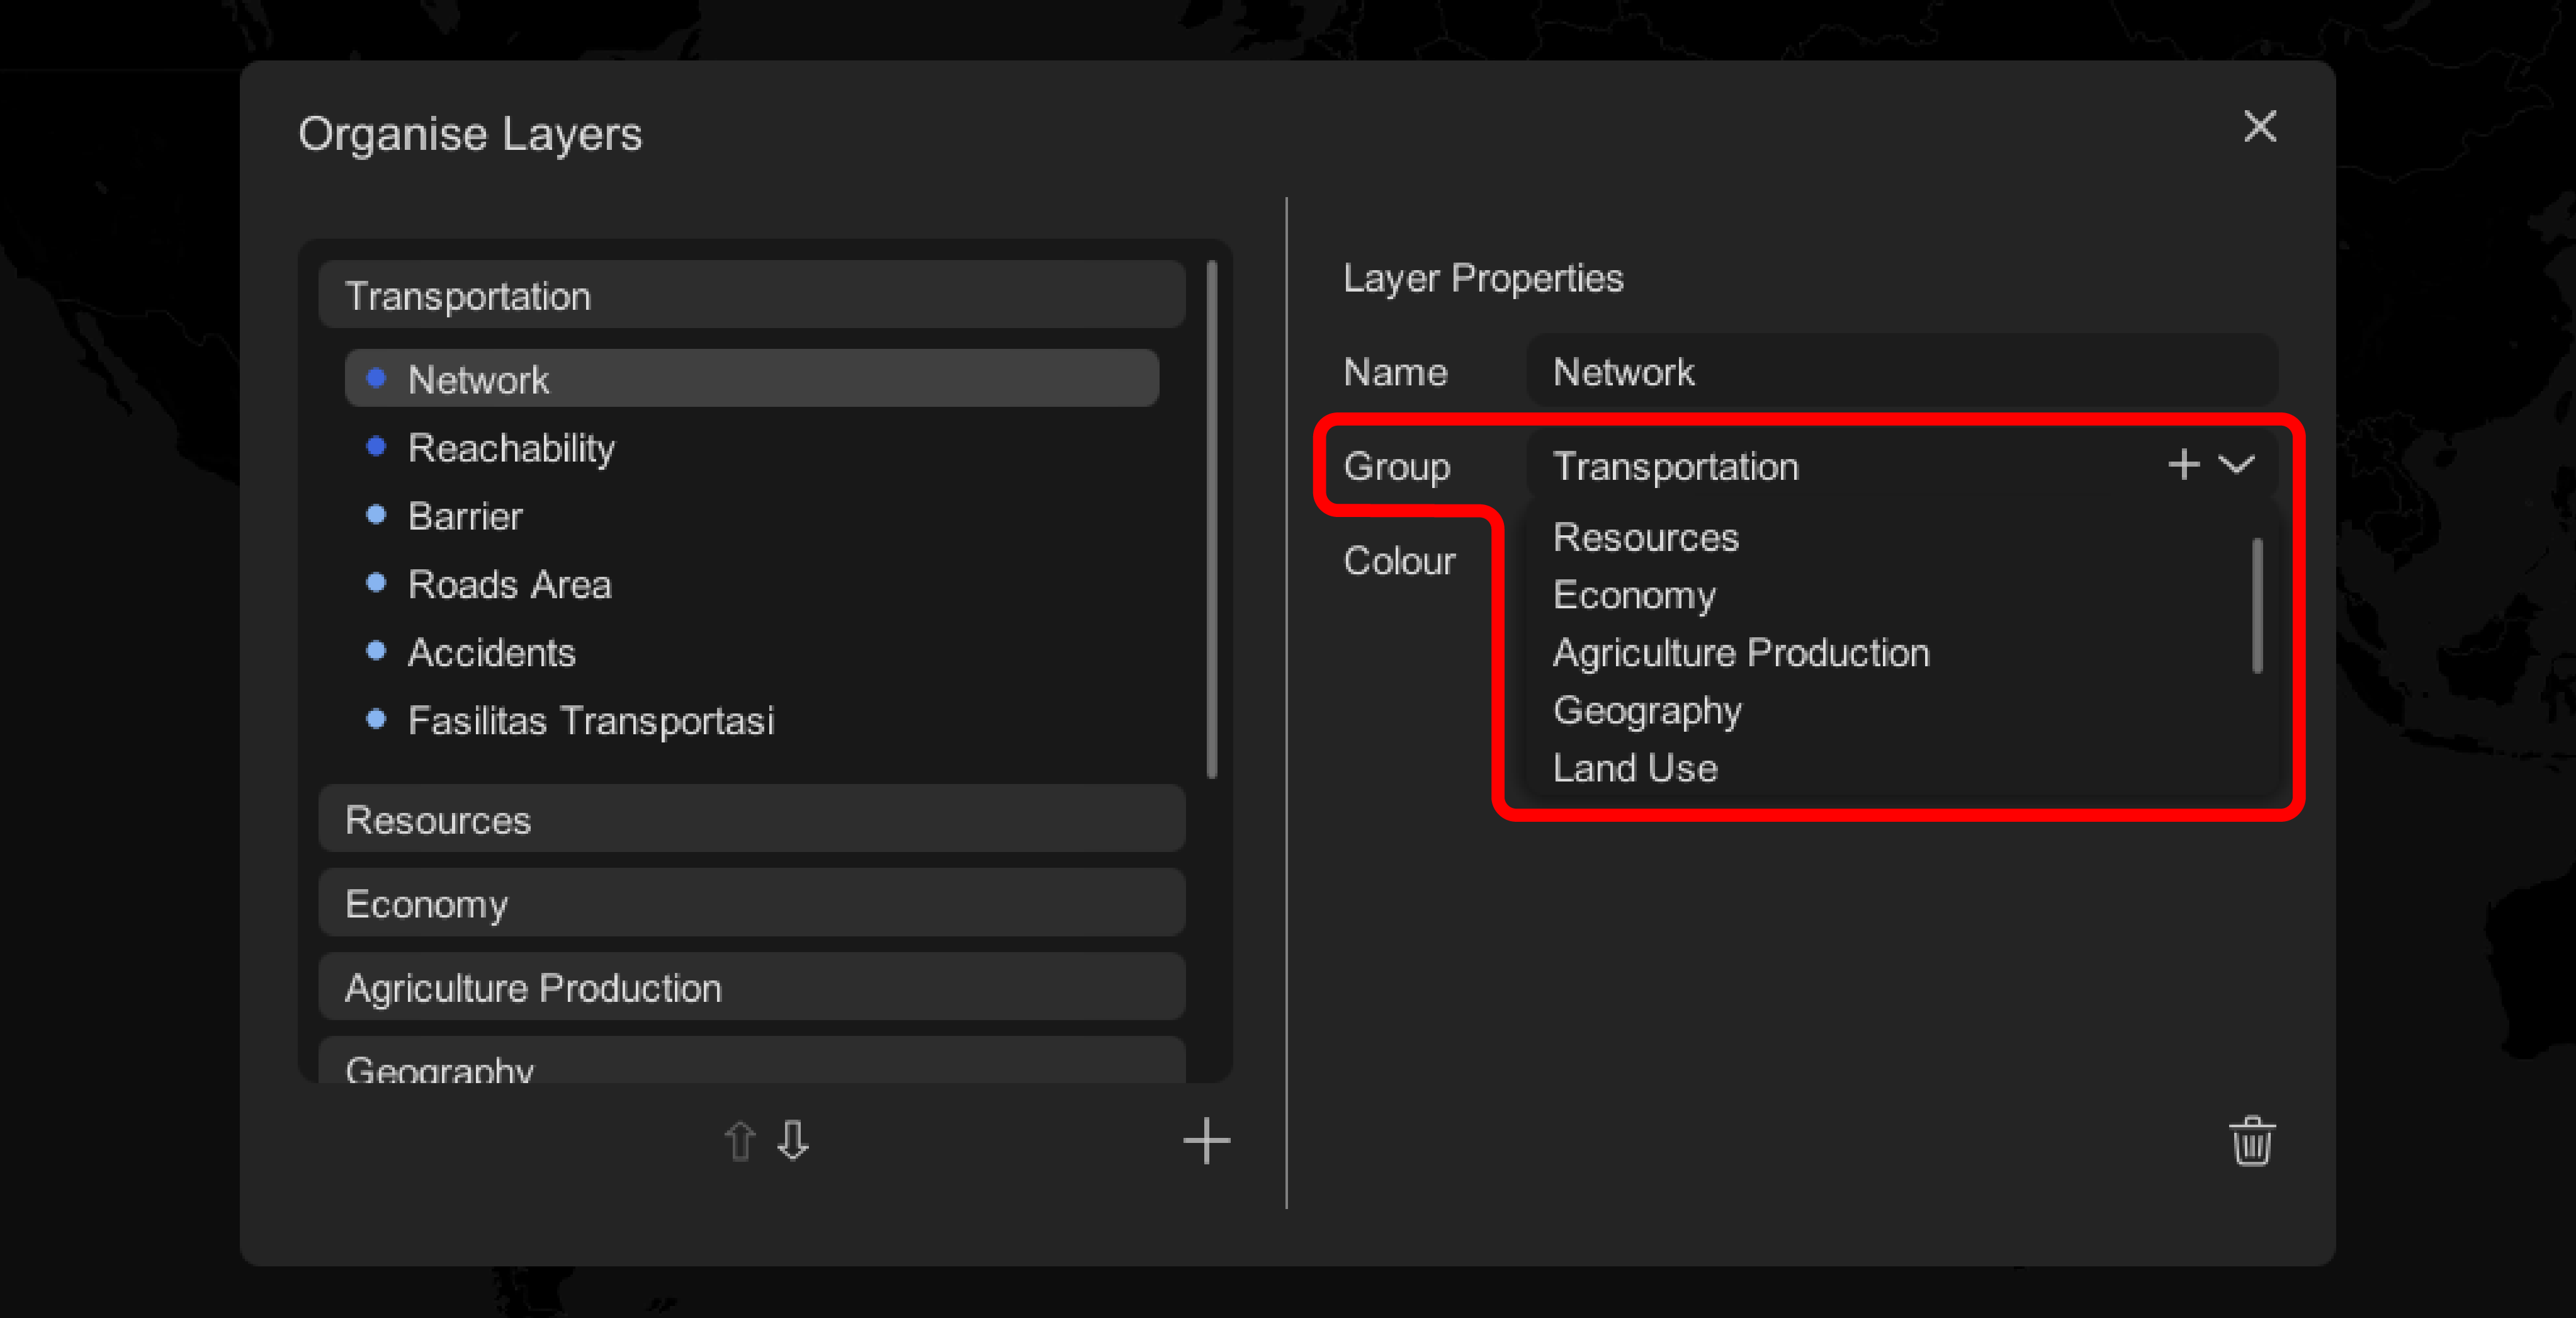
(ii) Assign Data Layer to a New Group
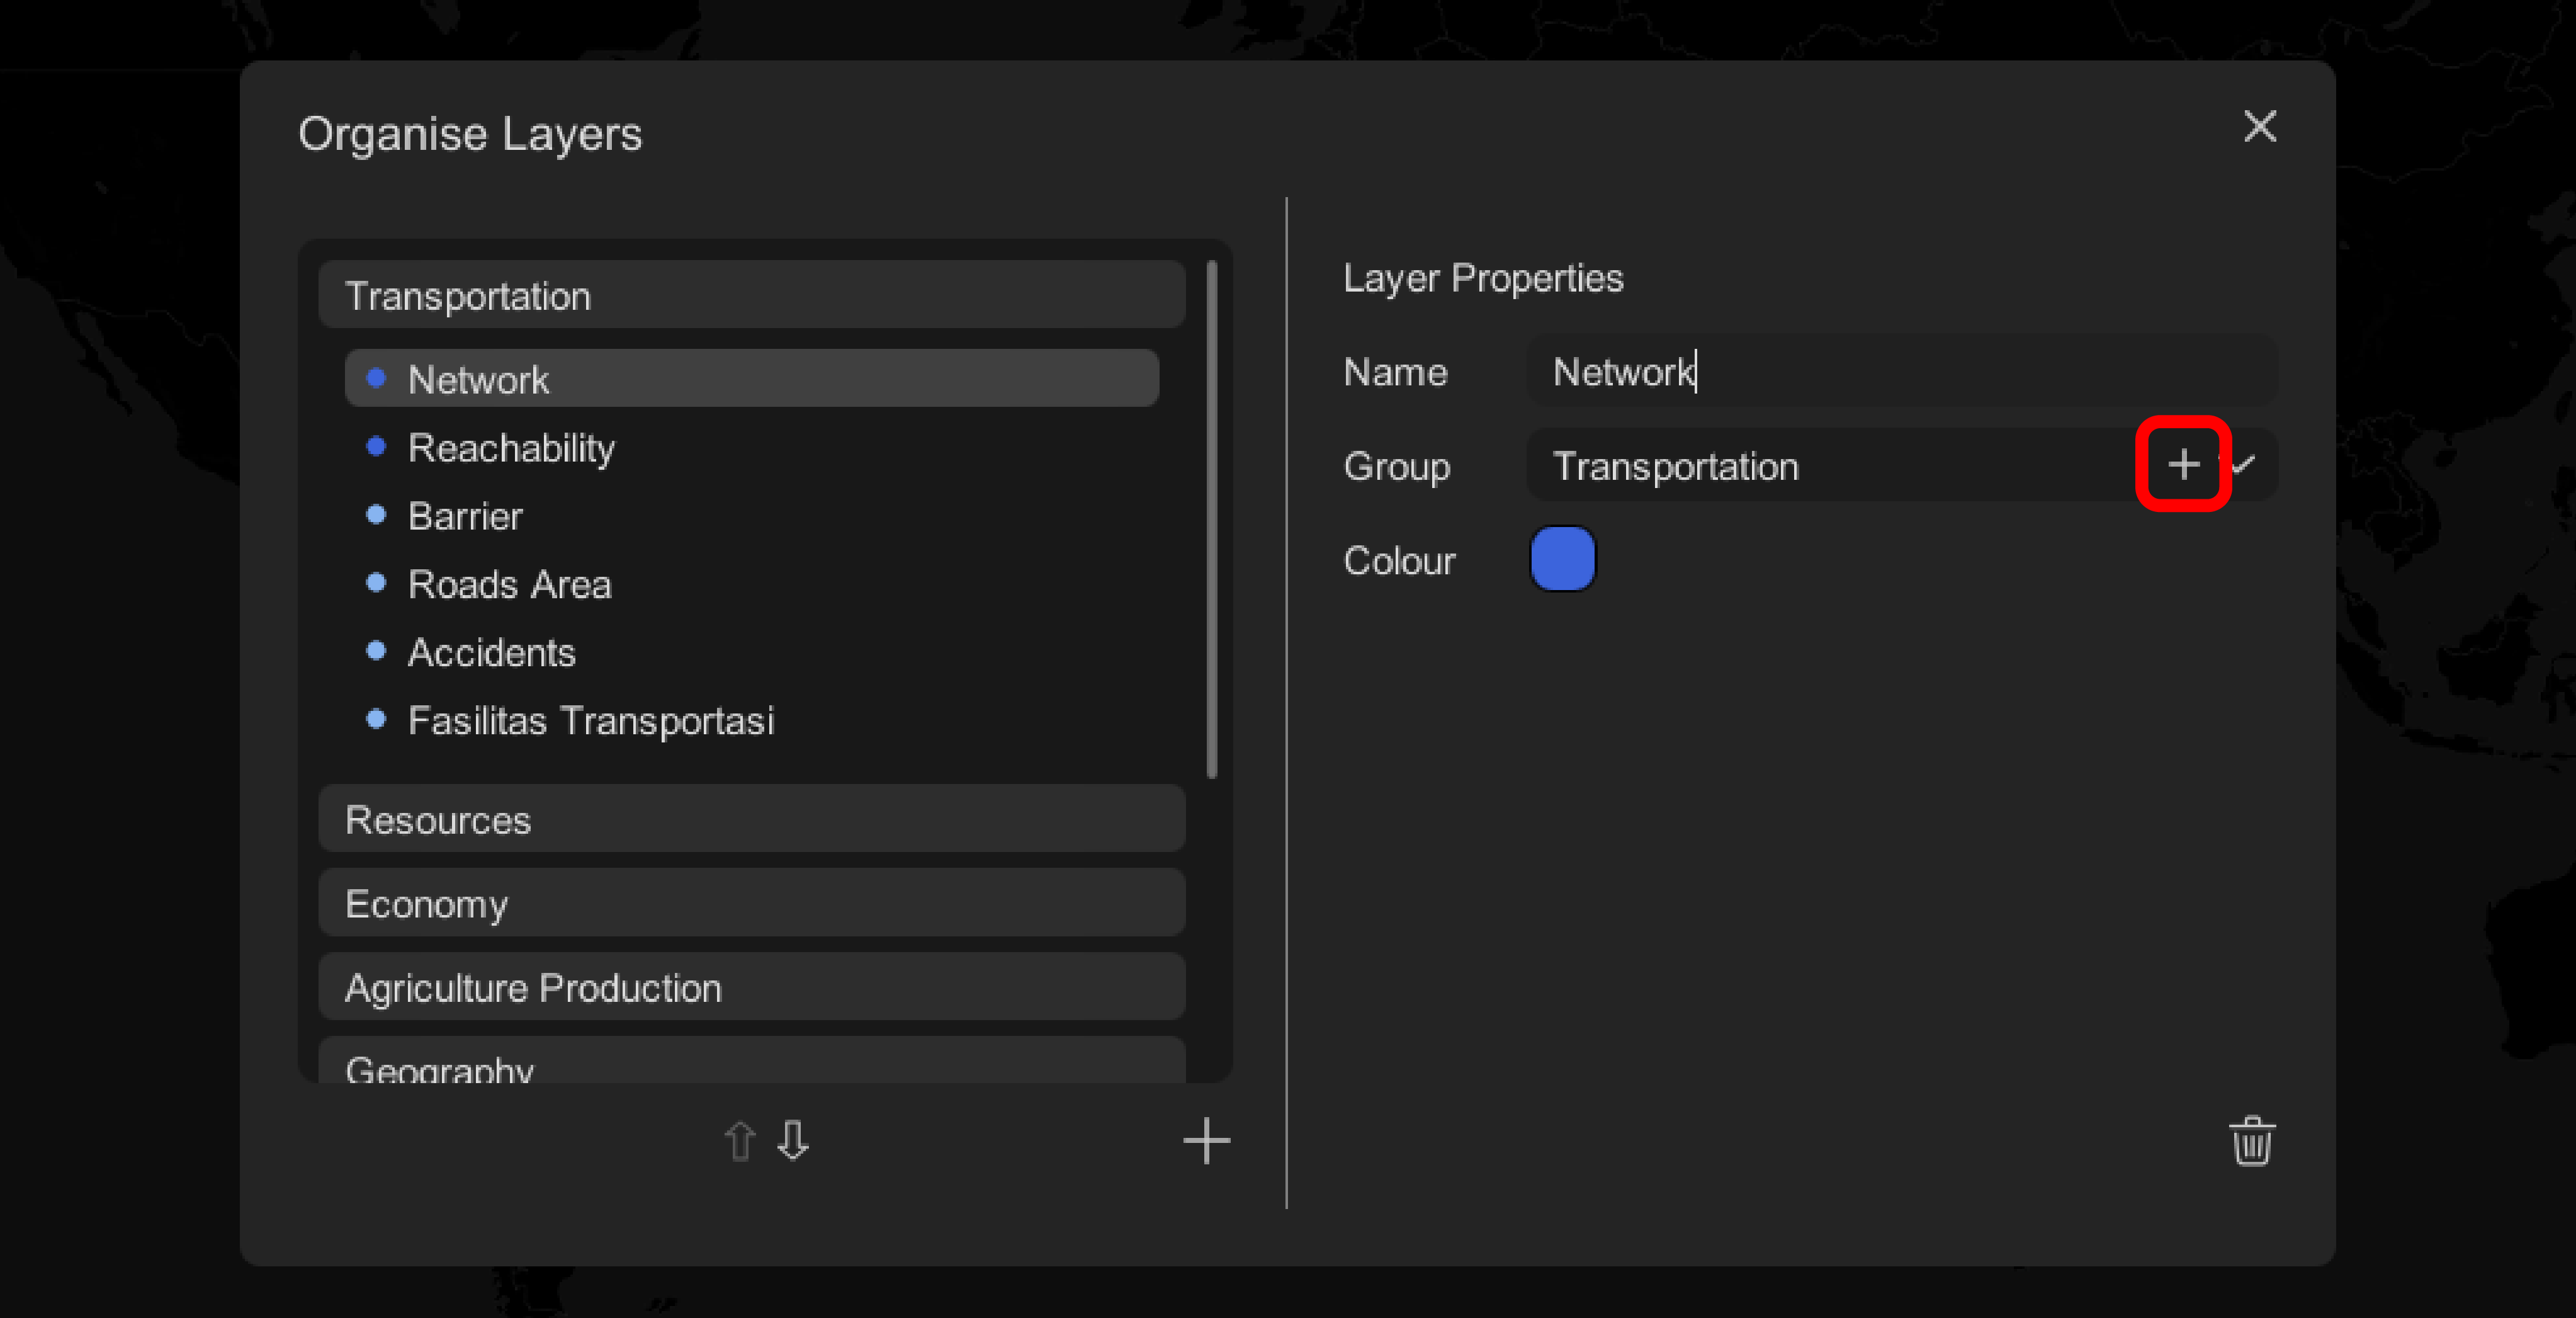
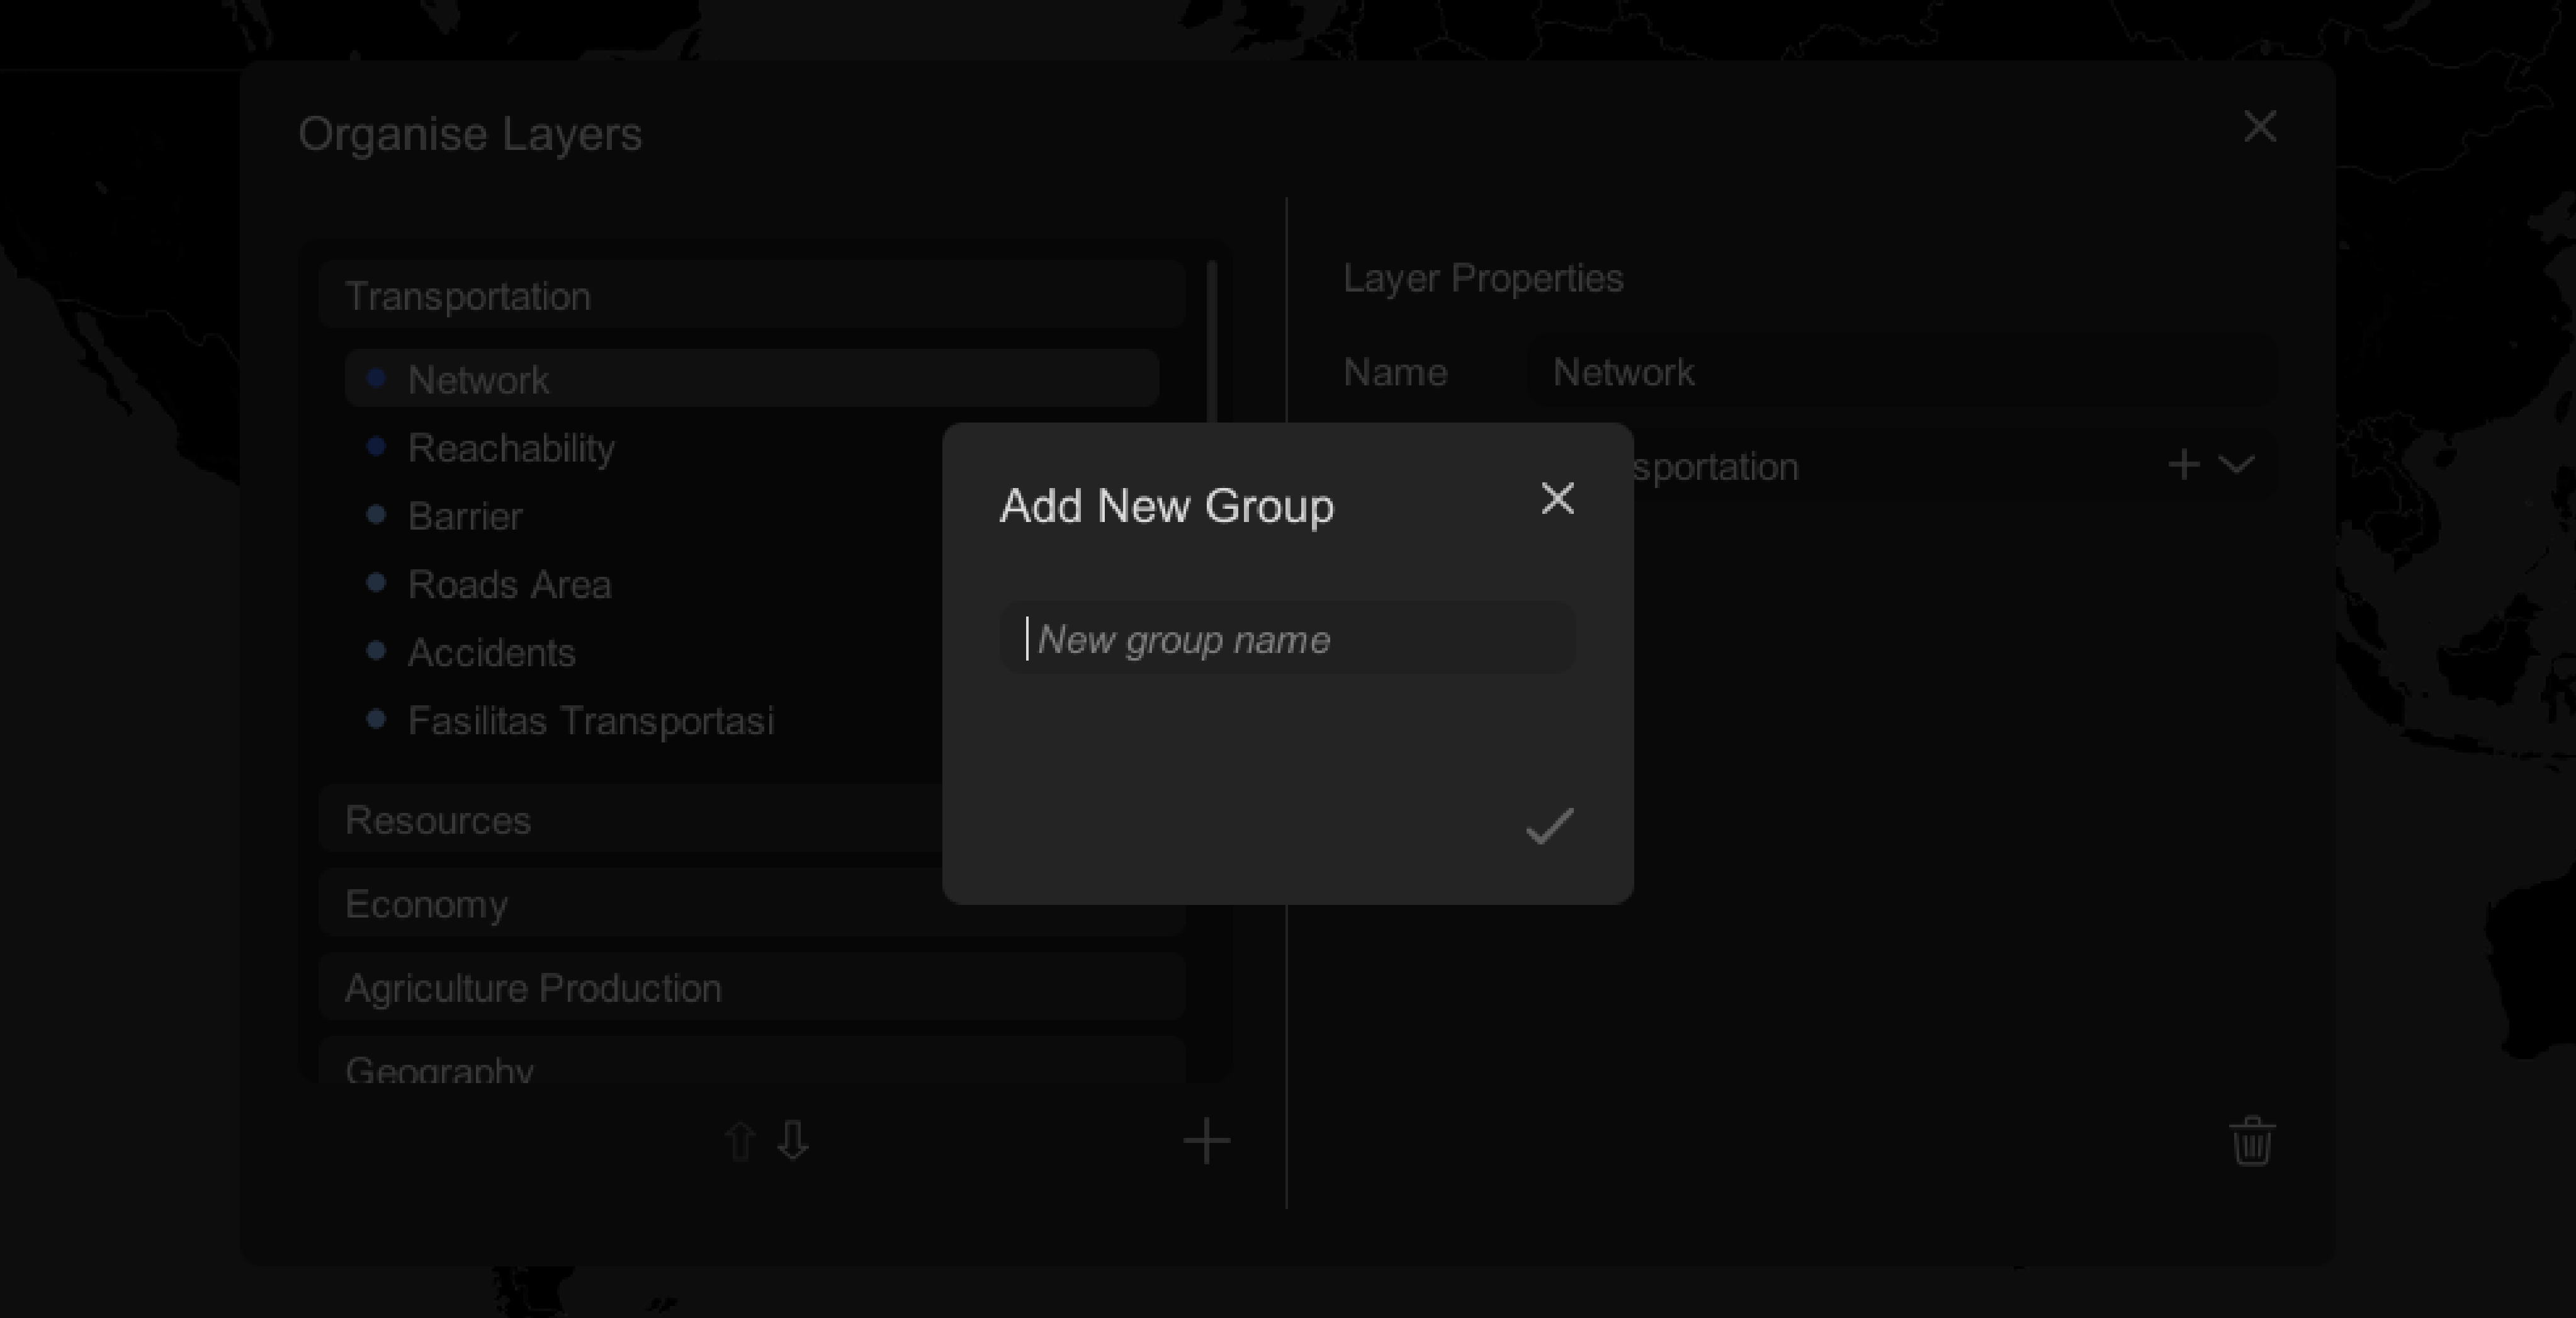
To assign the data layer to a new group, click on the ' + ' arrow. This will reveal a pop-up window where you can enter the name of the new group.
Step 5: Change Data Layer Display Colour
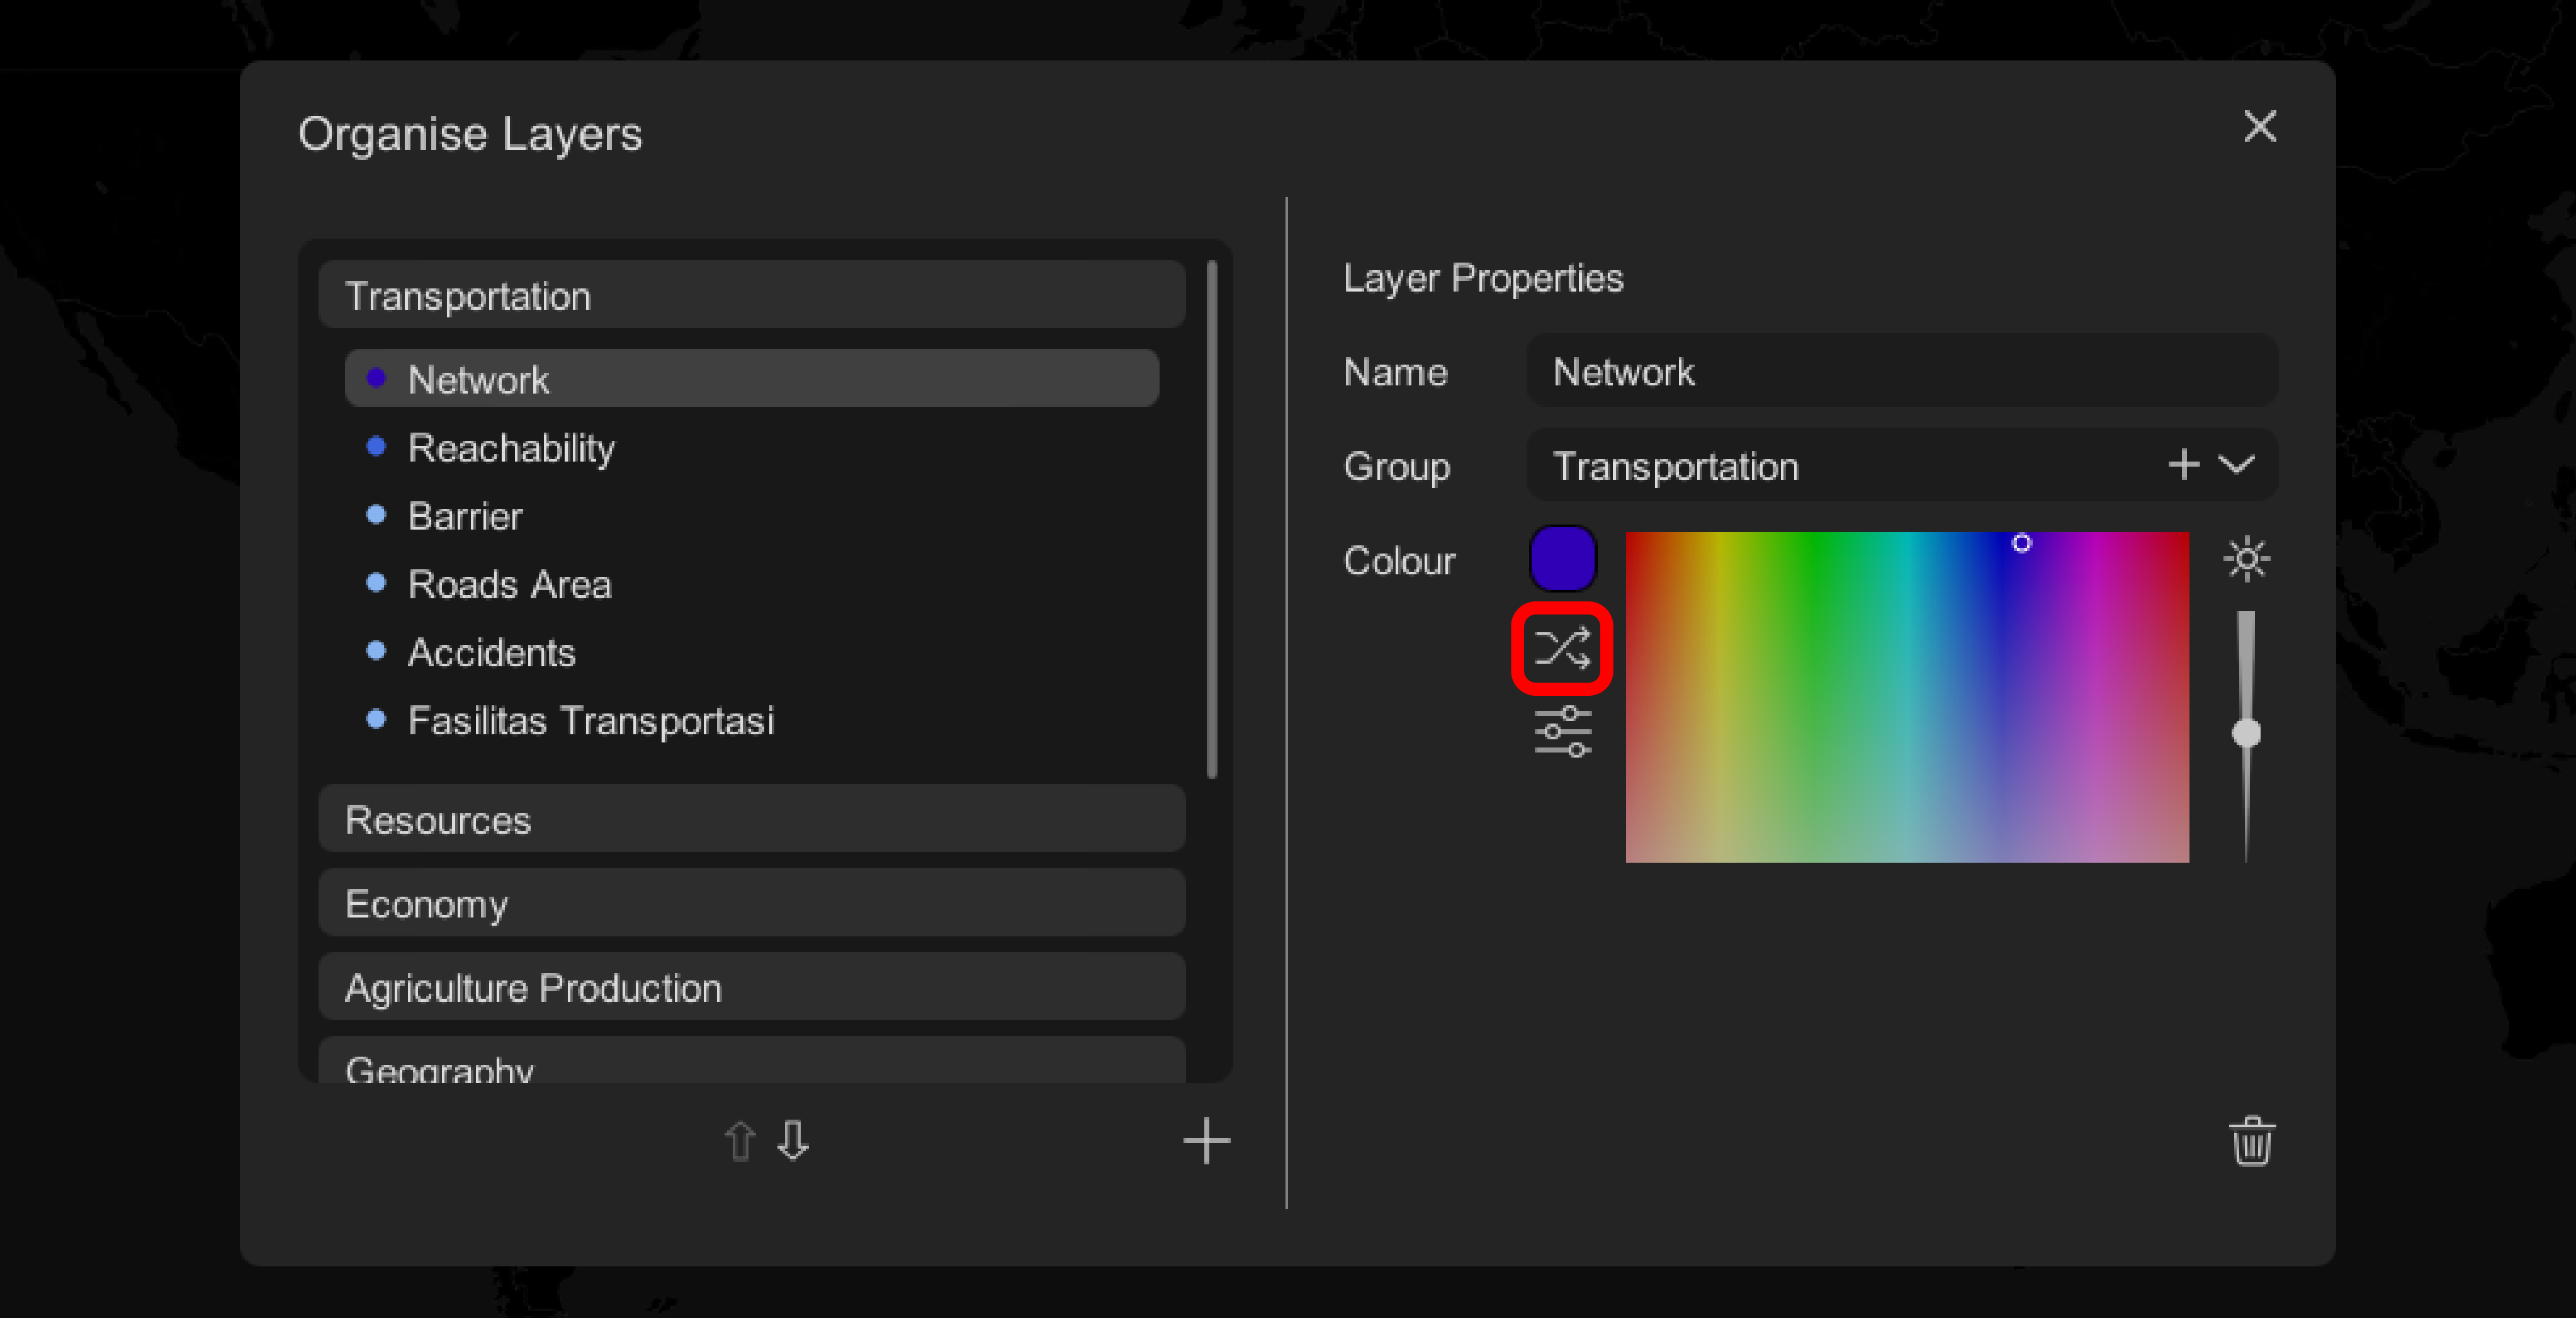
To change the display colour, click on the colour swatch. A colour palette will appear for you to select from.
You may also use the 'Random Picker' button to random pick a colour in the event you cannot decide.
Alternative Step: Re-order Data Layer/ Groups
To re-order data layer/ groups, first select the layer/ group you would like to change its order. Next, use the 'Up' and 'Down' arrows to easily change its order.
Alternative Step: Delete Layer
To delete a layer, first select the layer, then click the 'Trash Bin' button at the bottom right corner of the window.
Alternative Step: Create New Group
To create a new group, click the ' + ' button.
