¶ Layer Preparation
Step 1: Load new layer
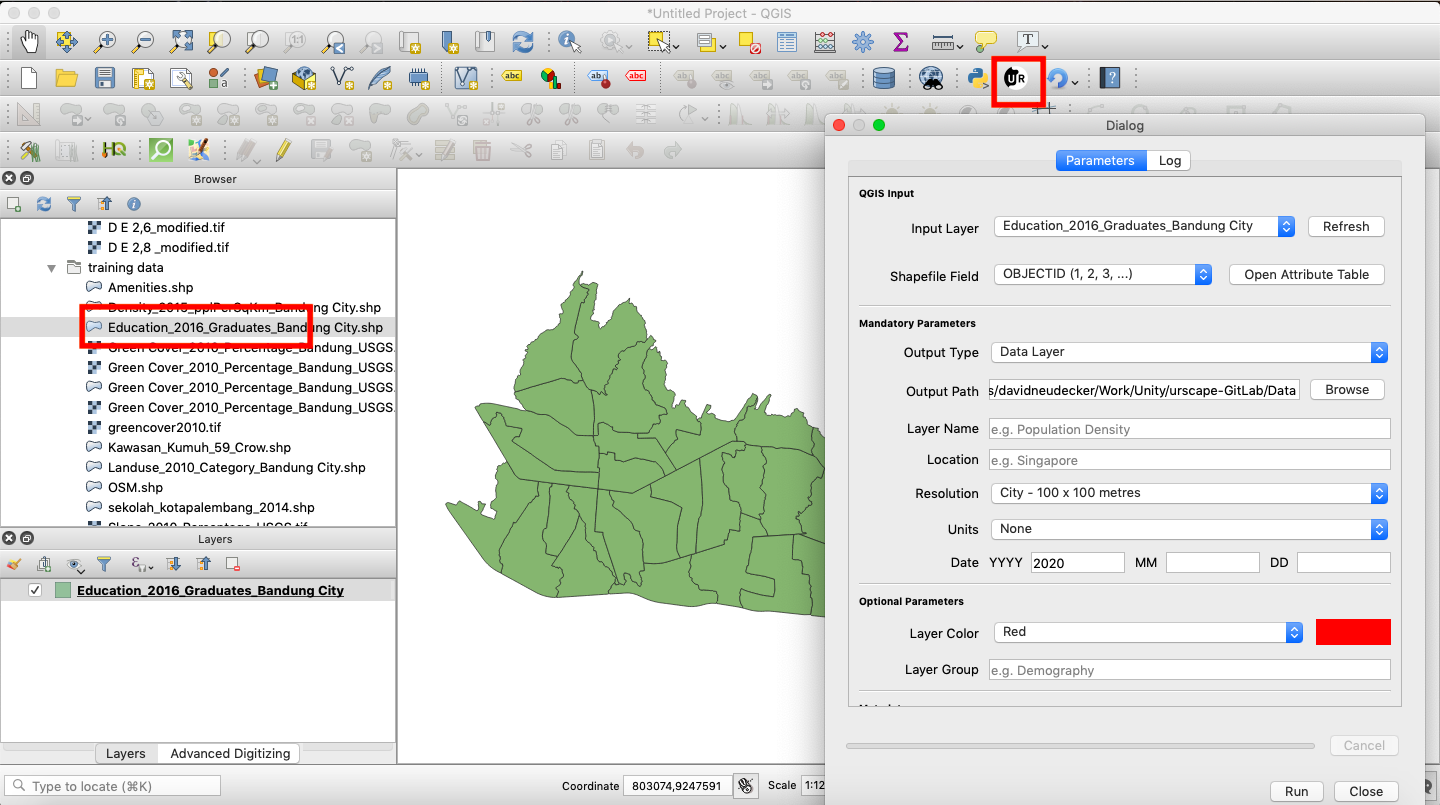
In QGIS Browser locate the layer you want to import into ur-scape and by double click load layer to Layer Panel
Step 2: Open ur-scape Data Import plug-in
Click on the icon of ur-scape in your QGIS. If your didn't instal plug-in yet, please follow QGIS_Plugin_Installation instructions.
¶ QGIS Input
Step 3: Select Input Layer
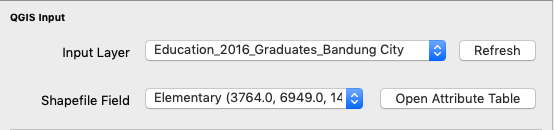
From the Input Layer drop-down menu select one of the layers loaded in QGIS Layers panel.
Please note that if you loaded layer after opening plug-in you need to Refresh first in order to see a layer in the drop-down menu list.
Step 4: Choose filed (Shapefile Only)
in case you selected Shapefile as a layer to be imported to ur-scape, you need to choose show field with data should be exported. In drop-down menu, you can do direct choose with samples of data inside of brackets. You can also click on Open Attribute Table to see data in full range.
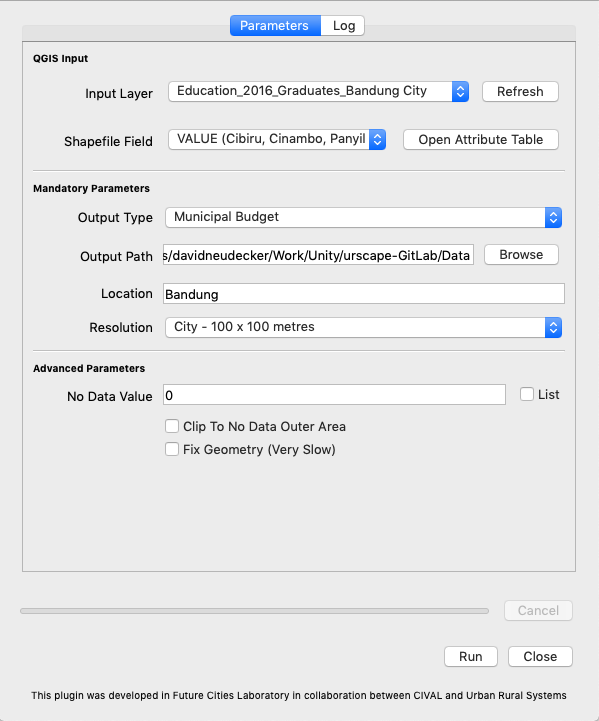
¶ Mandatory Parameters
Step 5: Select Output Type
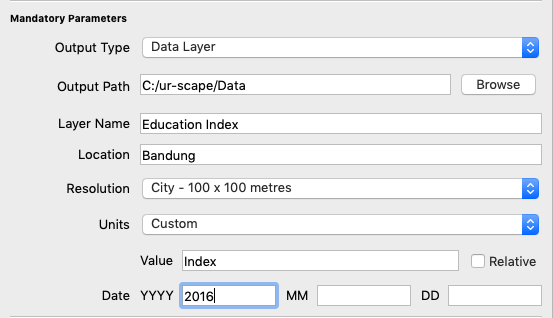
For the purpose of this tutorial please select the default Data Layer option, which will allow exporting Standart Data Layer
For the other Options please continue to:
- Municipal Budget
- Reachability
Step 6: Select Output Path
You can type the path to the Data folder of your ur-scape version directly or you can navigate to a folder by clicking on Browse
Step 7: Write Layer Name
In the Layer Name text field write down your preferred name o layer. This name will appear in ur-scape as Data Layer Name.
Step 8: Write Layer Location
In the Location text field write down your preferred location data should belong to. This location will define under which site will Data Layer appears.
Step 9: Select resolution
From the Resolution drop-down menu select preferred resolution base on the jurisdiction.
- Metropolitan resolution should be used for subnational administrative units and metropolitan areas
- City resolution should be used for cities and towns
- Neighborhood resolution should be used for districts and small towns
- Custom resolution will activate a resolution text box where you can type the resolution of your choice in meters.
Please note that choosing appropriate resolution will influence ur-scape performance. Resolution under 10 meters is not recommended.
Step 9: Select Units
From Resolution drop-down menu select units best describing your dataset or type your own activate text field by selecting the Custom option.
Step 10: Write Date
|in the appropriate text fields please write down a time period of the data. Writing the only year is acceptable.
¶ Optional Parameters
Step 11: Select Color
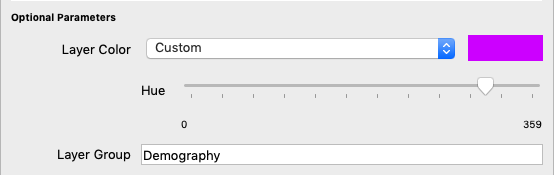
From Layer Color drop-down menu select color how it should Data Layer appear in ur-scape. You can also choose the Custom option and select color on the activated slider.
Step 12: Define Group
If applicable, write the name of the group under which you would like to see Data Layer organize din ur-scape
¶ Metadata Parameters

Step 13: Write Source
If applicable, write appropriate source for the dataset int to Source text field
Step 14: Write Citation
If applicable, write an appropriate citation for the dataset int to Citation text field
Step 15: Write Link
If applicable, write the link of the dataset where can be download int to URL Link text field
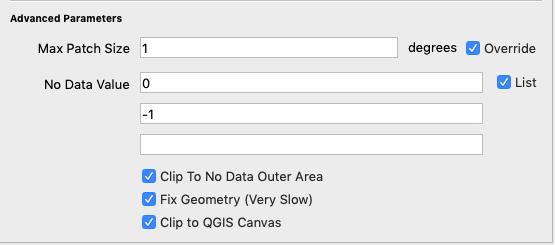
¶ Advance Parameters
Step 16: Define Max Patch Size
Variable Max Patch Size defines after how many degrees will be dataset split into multiple files, to ovoid too big files. To change this value please first check Override checkbox and then type yours preferred valued in degrees to Max Patch Size text field.
Step 17: Set no Data
If you wish to ignore some values from the dataset you can specify them in No Data Value. If you wish to specify more then one value, you can do it by checking List checkbox and more extra field will appear. The new field now appears every time you add new no data value
Step 18: Check Clip No Data
If you wish to clip the extent of the data patch to only areas with some data, please check Clip To No Data Outer Areas checkbox.
Step 19: Check Fix Geometry
If you wish to check geometry for any mistakes and fixing them, please check the Fix Geometry checkbox.
Step 20: Check Clip to QGIS Canvas
If you wish to clip dataset extent to actual QGIS canvas extent, please check Clip to QGIS Canvas checkbox.
¶ Municipal Budget Advance Parameters
If you aim to export layer for Municipal Budget scenario, please note that you need to choose Shapefile with Polygons and field with administrative units. For the rest of the setup, you can follow the steps above
¶ Reachability Advanced Parameters
If you aim to export layer for the Reachability scenario, please note that you need to choose Shapefile with Lines and field with road types units.
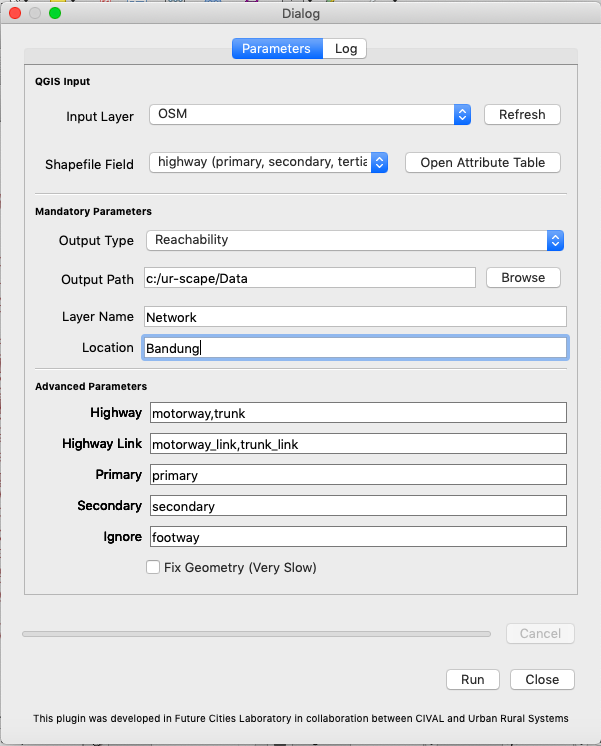
Step Extra: Match data set road types with ur-scape road categories
in order to translate correctly road types from dataset to road categories which ur-scape can understand, users have to define which road types belongs to the right category ("Highway", "Highway_link", "Primary", "Secondary"). Road type which is not defined under one of the categories will be defined as "Other". If you wish to not export some road type please write it under "Ignore"
For the rest of the setup, you can follow the steps above.